Why We Ditched WordPress for the JAMstack
In this post, I’ll discuss why we migrated from WordPress to the JAMstack and never looked back. Later on, I'll show you how to set up a JAMstack website with a headless CMS, AWS CloudFront, and S3 as a complete serverless stack.
A few months ago, our development team was tasked with building a quoting tool to facilitate the sales cycle. This feature would be similar to another module, in a different codebase. We'd want to reuse as much of this code as possible, as the module was quite complex.
After weighing out our options, we decided to port our existing WordPress website to the JAMstack. This decision not only included the new feature request, but concerns over security, cost, and maintenance of our current stack.
What is the JAMstack?
The JAMstack is an architecture designed to make websites faster, more secure, and easier to scale. It relieves the burden of patching, scaling, and maintaining any traditional servers.
What is a headless CMS?
A headless CMS (content management system) decouples the content and presentational layers. It provides content via an API, which any web or native applications can consume.
The 5 Pillars of the AWS Well-Architected Framework for JAMstack
It seems fitting to use the well-architected framework to discuss our migration decision.
1. Operational Excellence
The JAMstack architecture allows us to utilize our existing technologies and workflows which include:
- Git -- for version control, using a branch-based workflow
- Build Tools -- WebPack to help transpile, compile, lint, and optimize our code
- CI/CD -- to test, build and deploy our applications
- CDN -- AWS Cloudfront with an S3 origin
Using these battle-tested tools, we can make incremental changes with confidence.
2. Security
WordPress exposes many points of attack. Think SQL injection, outdated themes/plugins, and unauthorized logins.
While there are still concerns over any APIs you use, your production code comprises of read-only static files.
3. Reliability / 4. Performance Efficiency
JAMstack websites are pre-built during deployment. This means that the production site is static and serverless by default. We were able to reduce the complexity of maintaining and patching our old servers.
These sites can also be served entirely from a CDN providing unrivaled performance compared to a traditional server-side rendered webpage. CDNs are also redundant by nature and scale effortlessly.
5. Cost Optimization
By replacing our traditional servers with a simple CDN and S3 origin, we saw drastic cost savings per month.
Set up a Jamstack
Most Jamstack applications are composed of multiple services giving developers the opportunity to pick and choose the right tools for the job.
Our walkthrough stack will include:
- Gatsby - a static site generator
- Contentful - a headless CMS
- AWS Amplify - continuous delivery and static web hosting (CDN)
Set up Gatsby
I covered how to set up a gatsby blog in a previous blog post. Please follow this link and instructions. Once finished, jump back here to continue.
Set up Contentful
Alright, we now have a working Gatsby Blog 🎉. The next step will be to migrate our blog to Contentful. Markdown is great for developers, but let’s give our team an easier interface to work with.
Sign up for Contentful
Head over to the signup page: https://www.contentful.com/sign-up/
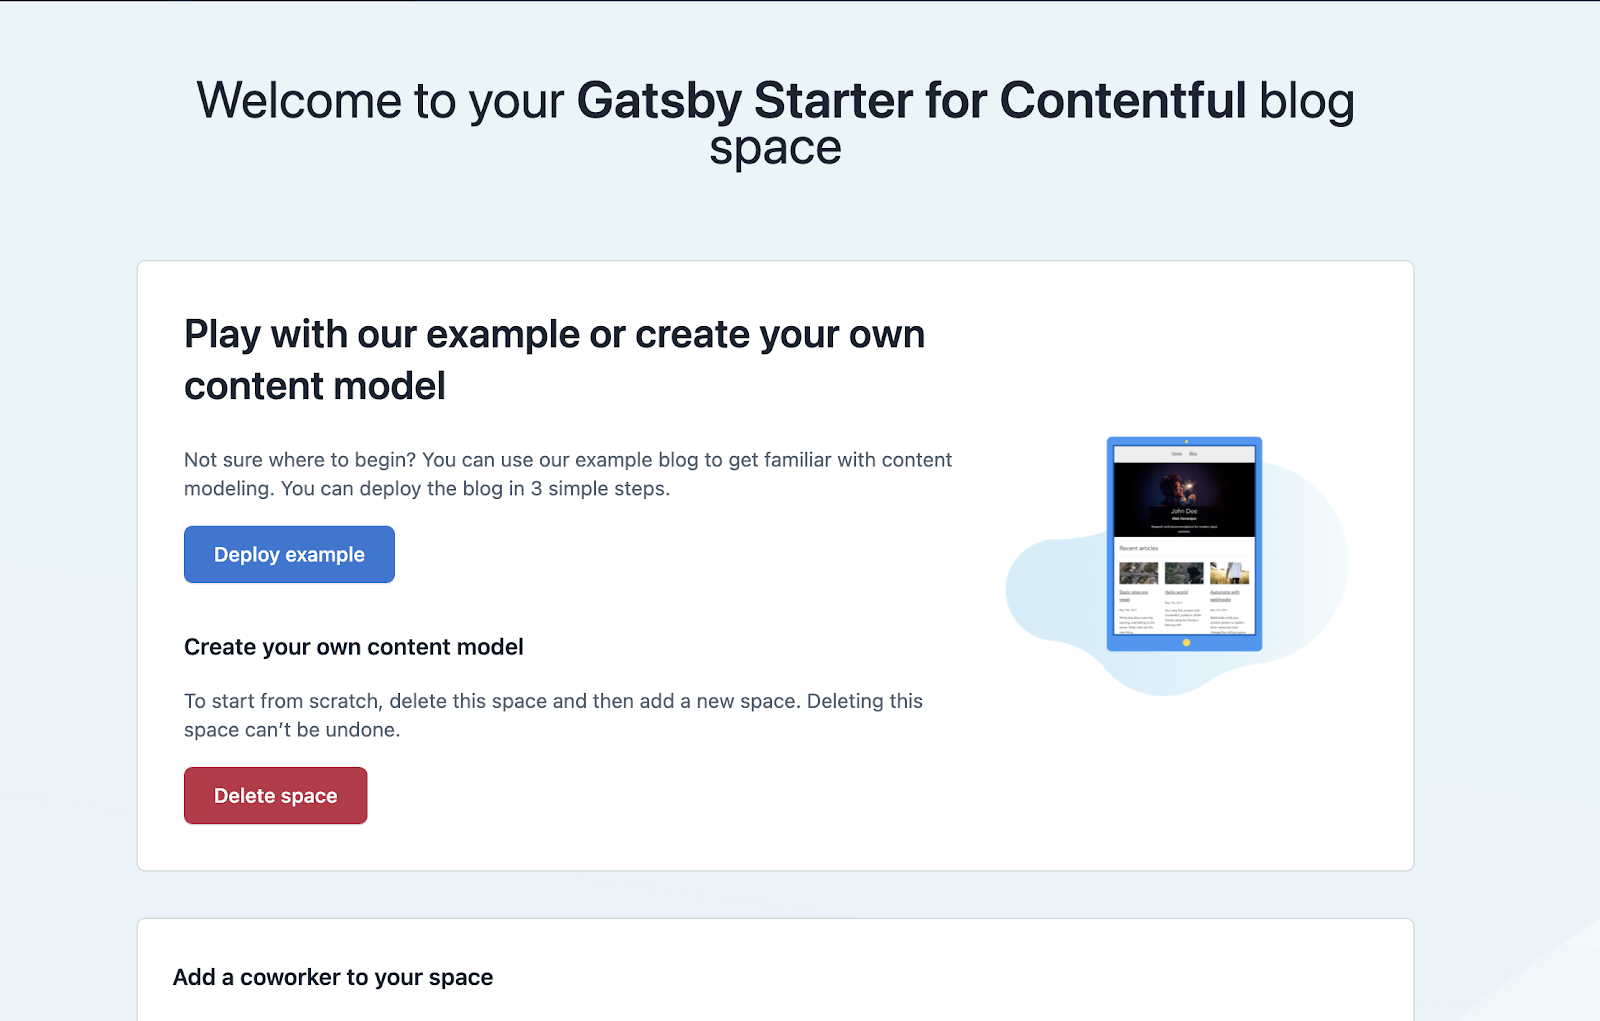
Once you finished signing up, should you see a screen similar to this:
Setup our BlogPost content model
We’ll configure everything we need in Contentful, then jump back to Gatsby to finish the integration.
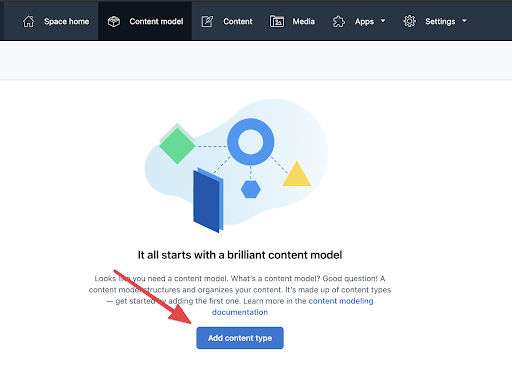
First, click on the “Content model” nav item.

Click the “Add content type” button.
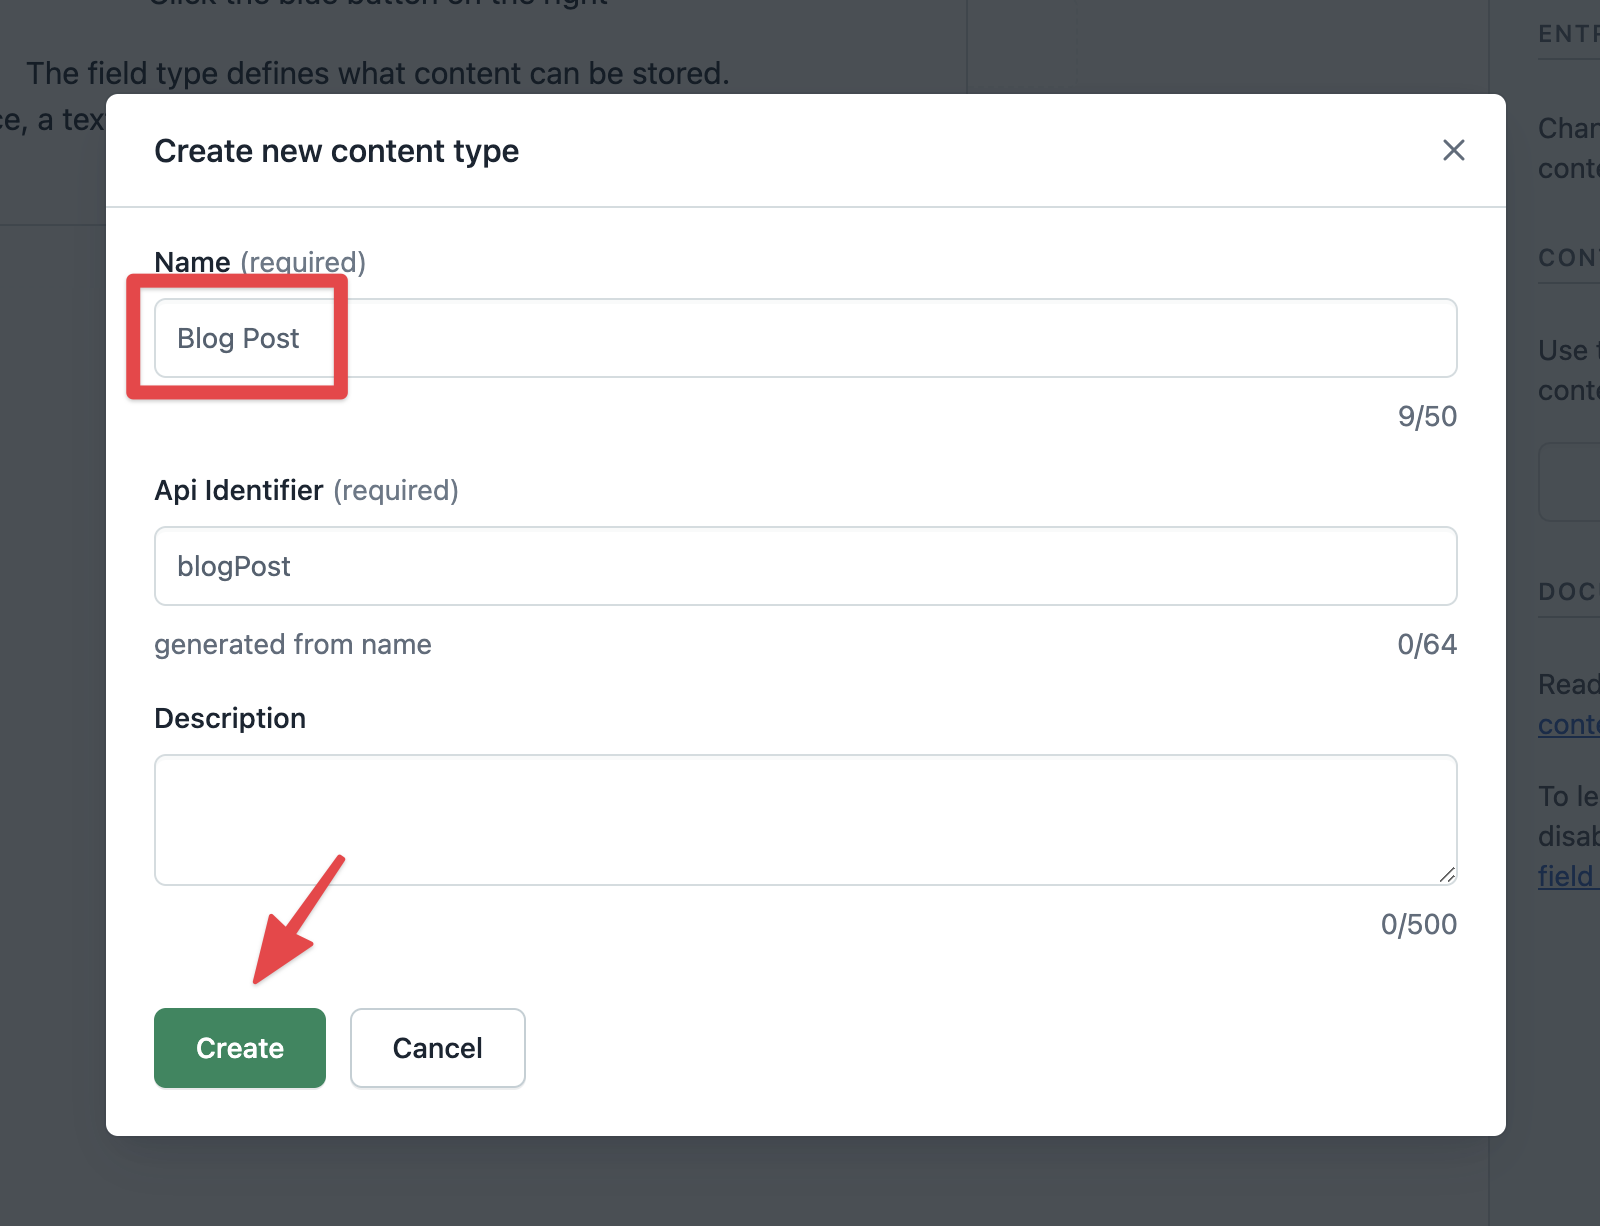
Fill in the form and click the “Create” button.
Time to add some fields:
Let’s start by defining the Title of the blog post.
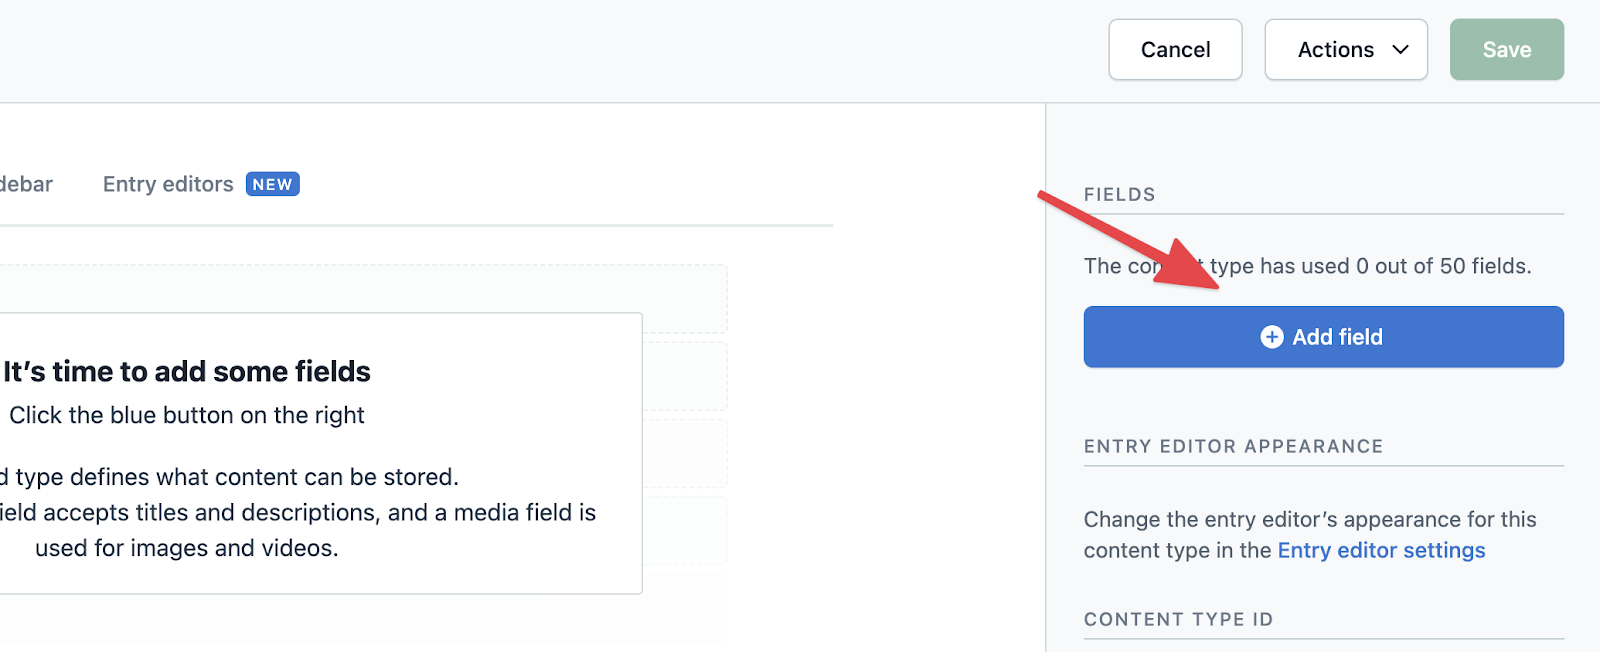
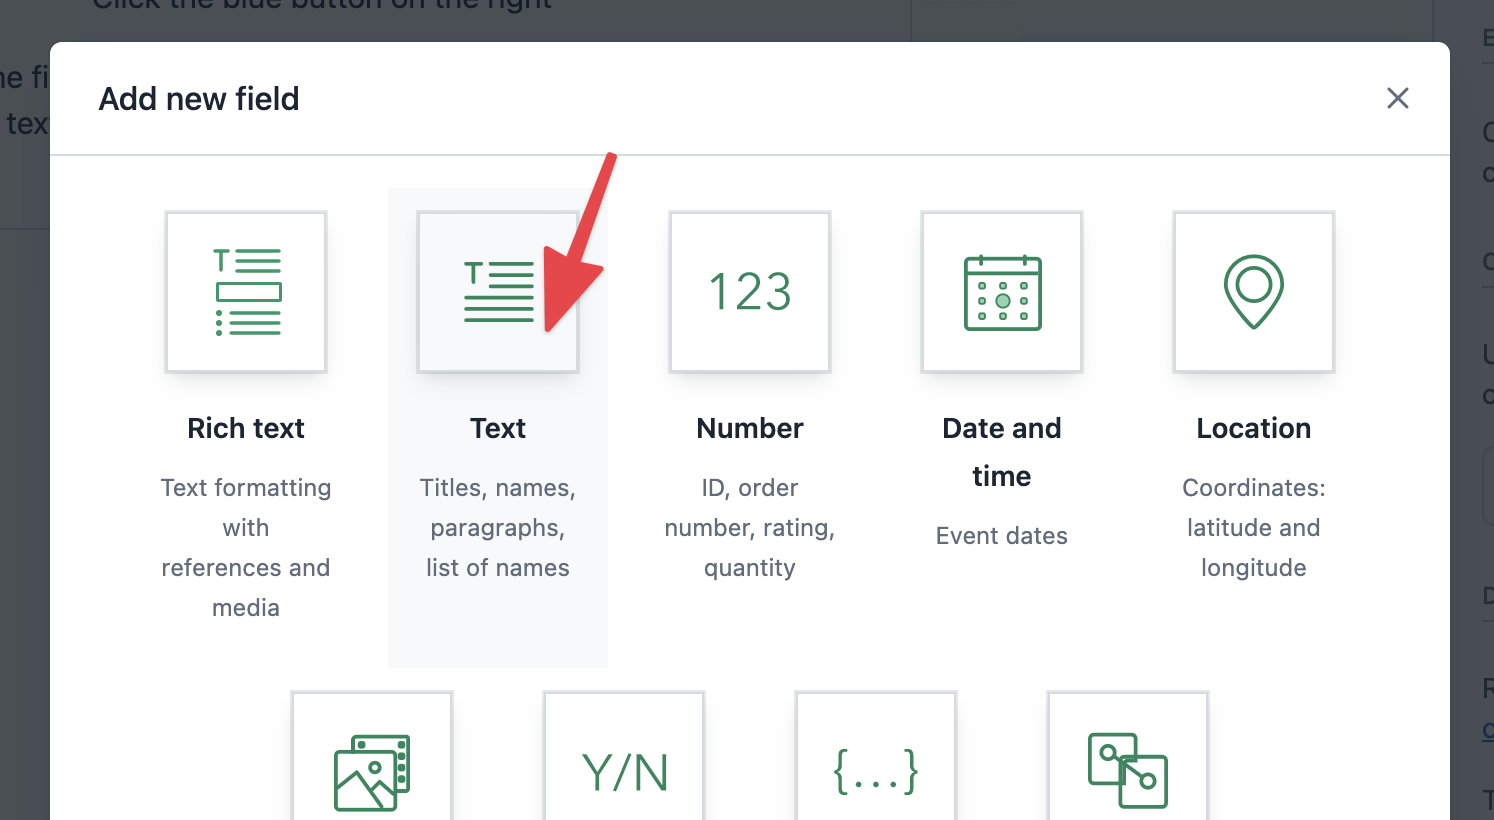
Click the Text option.
Fill in the form.
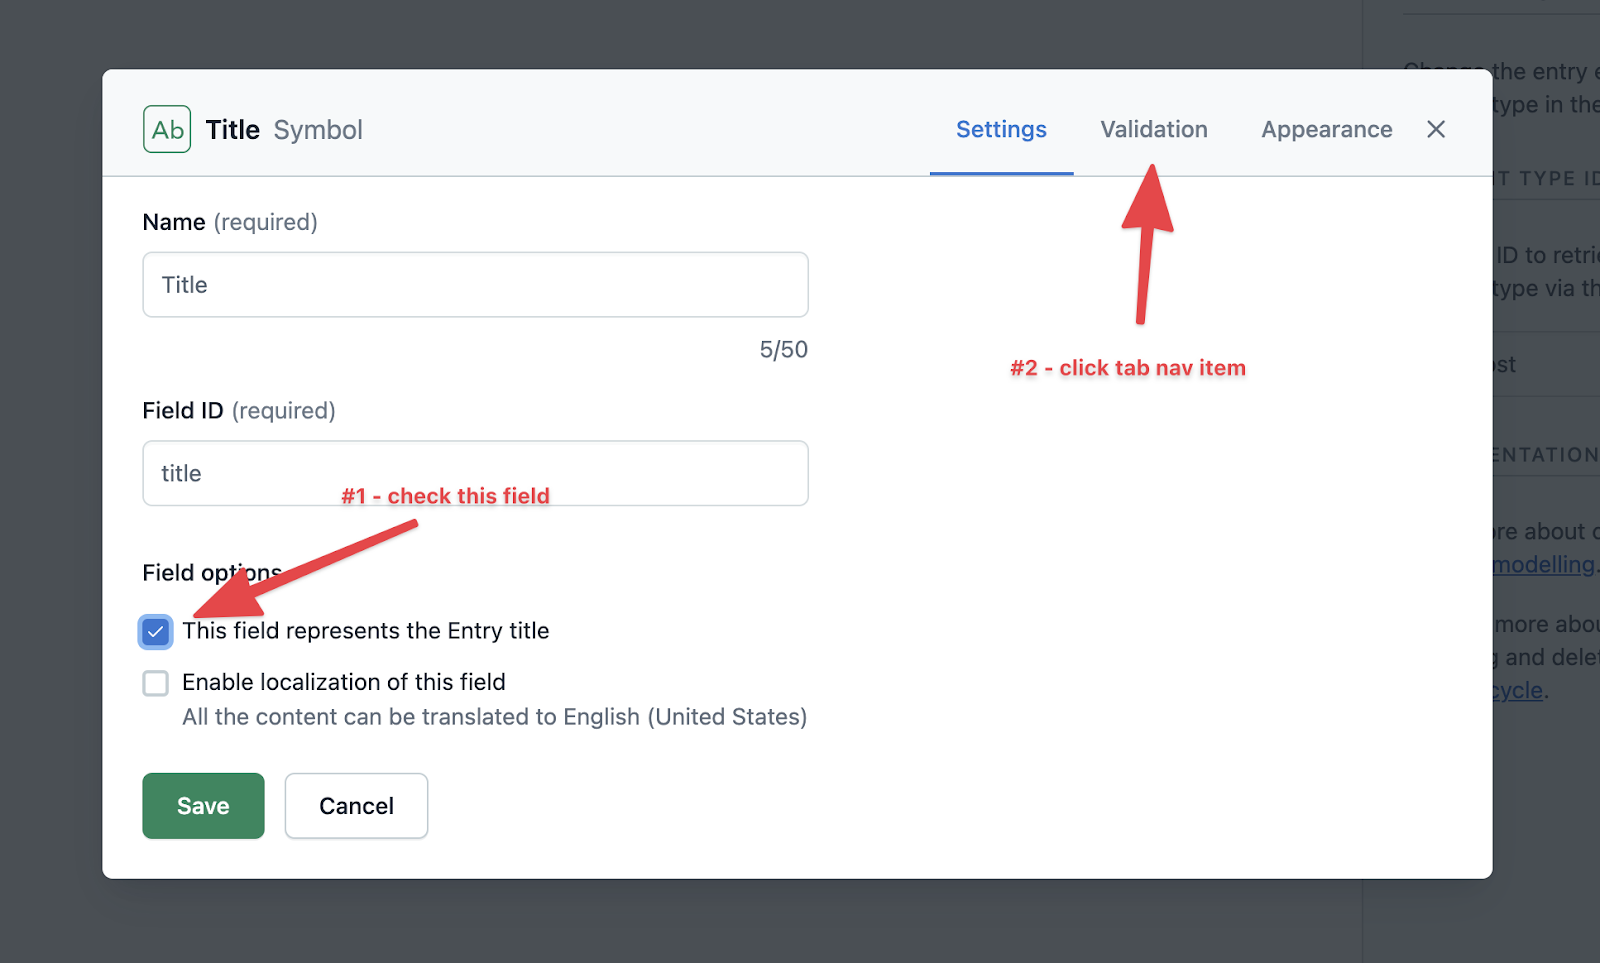
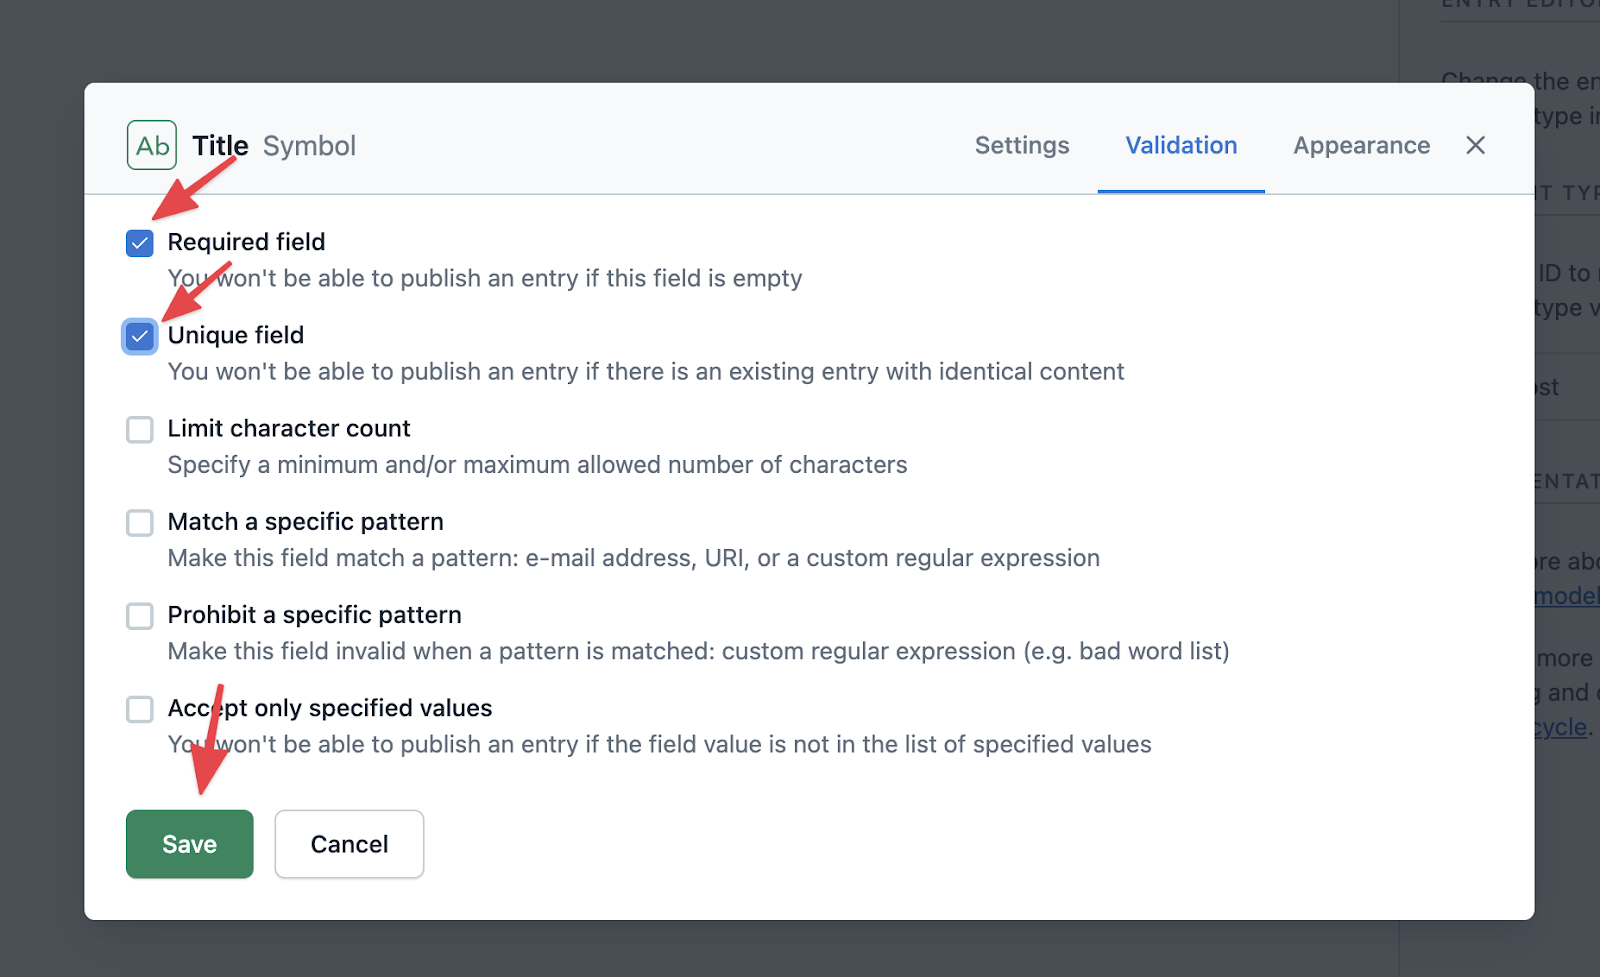
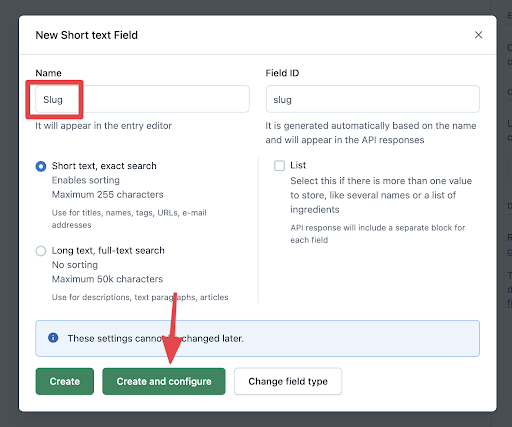
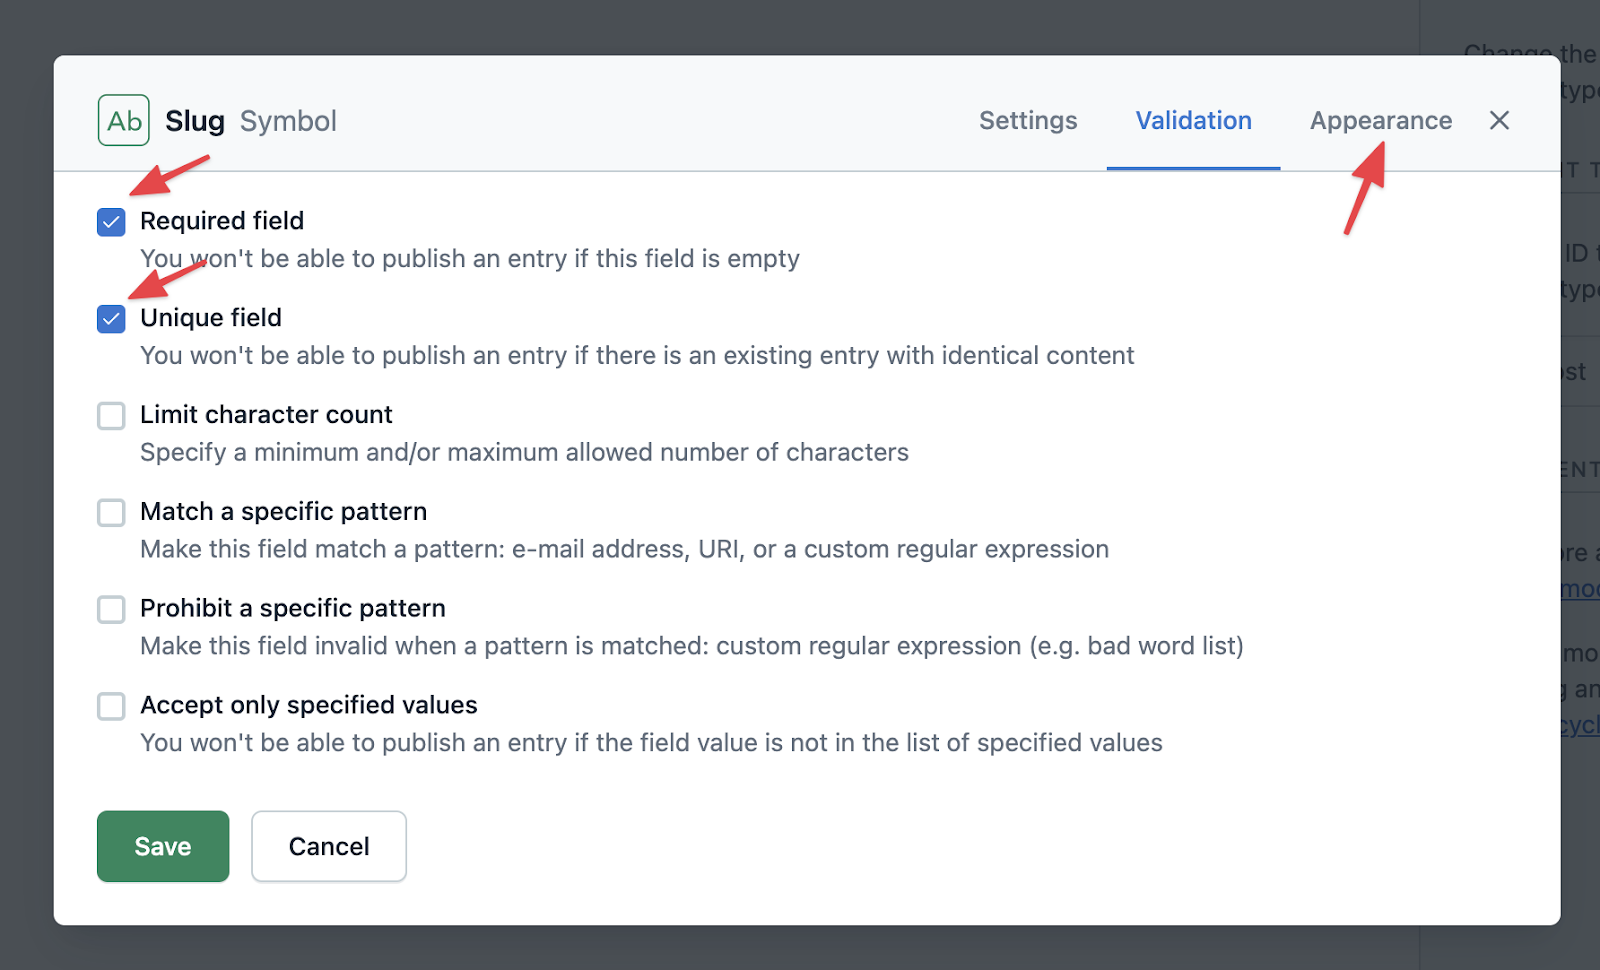
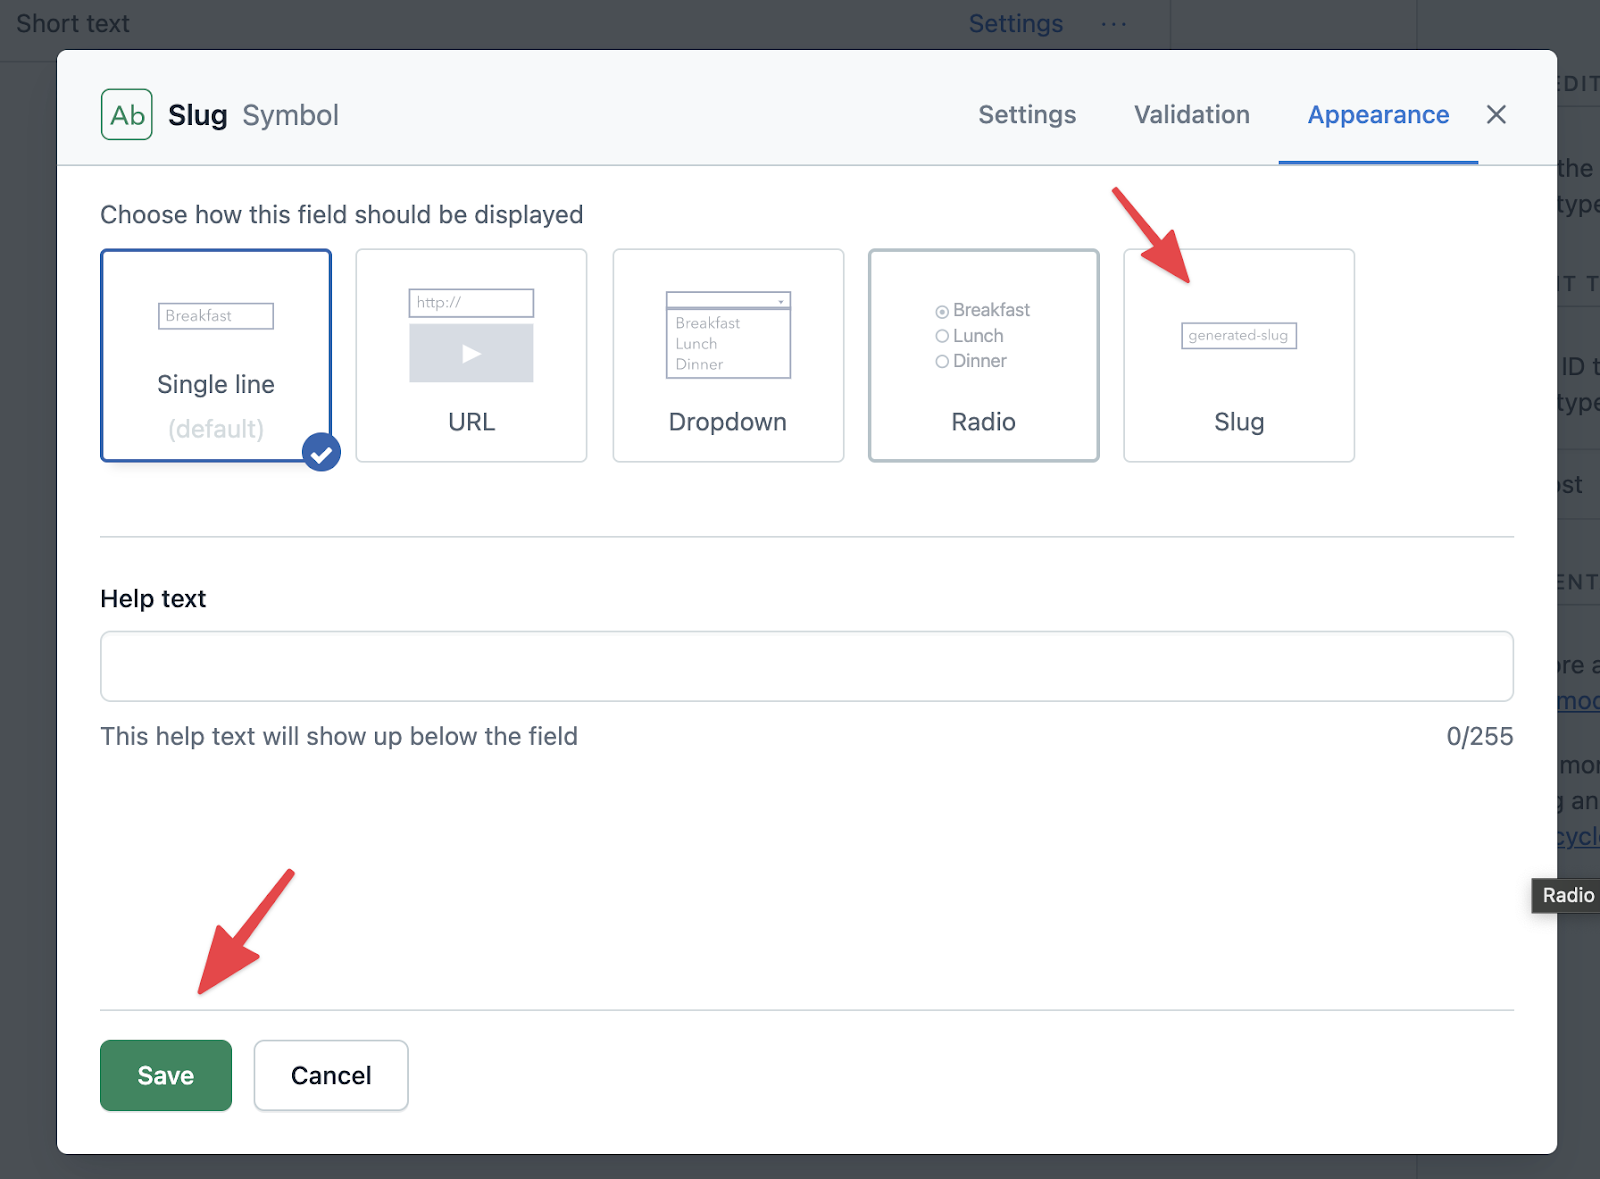
Add the Slug Field:
- Click “Add field” button (same step from Title field)
- Click “Text” option (same step from Title field)
Click the “Validation” tab nav item.
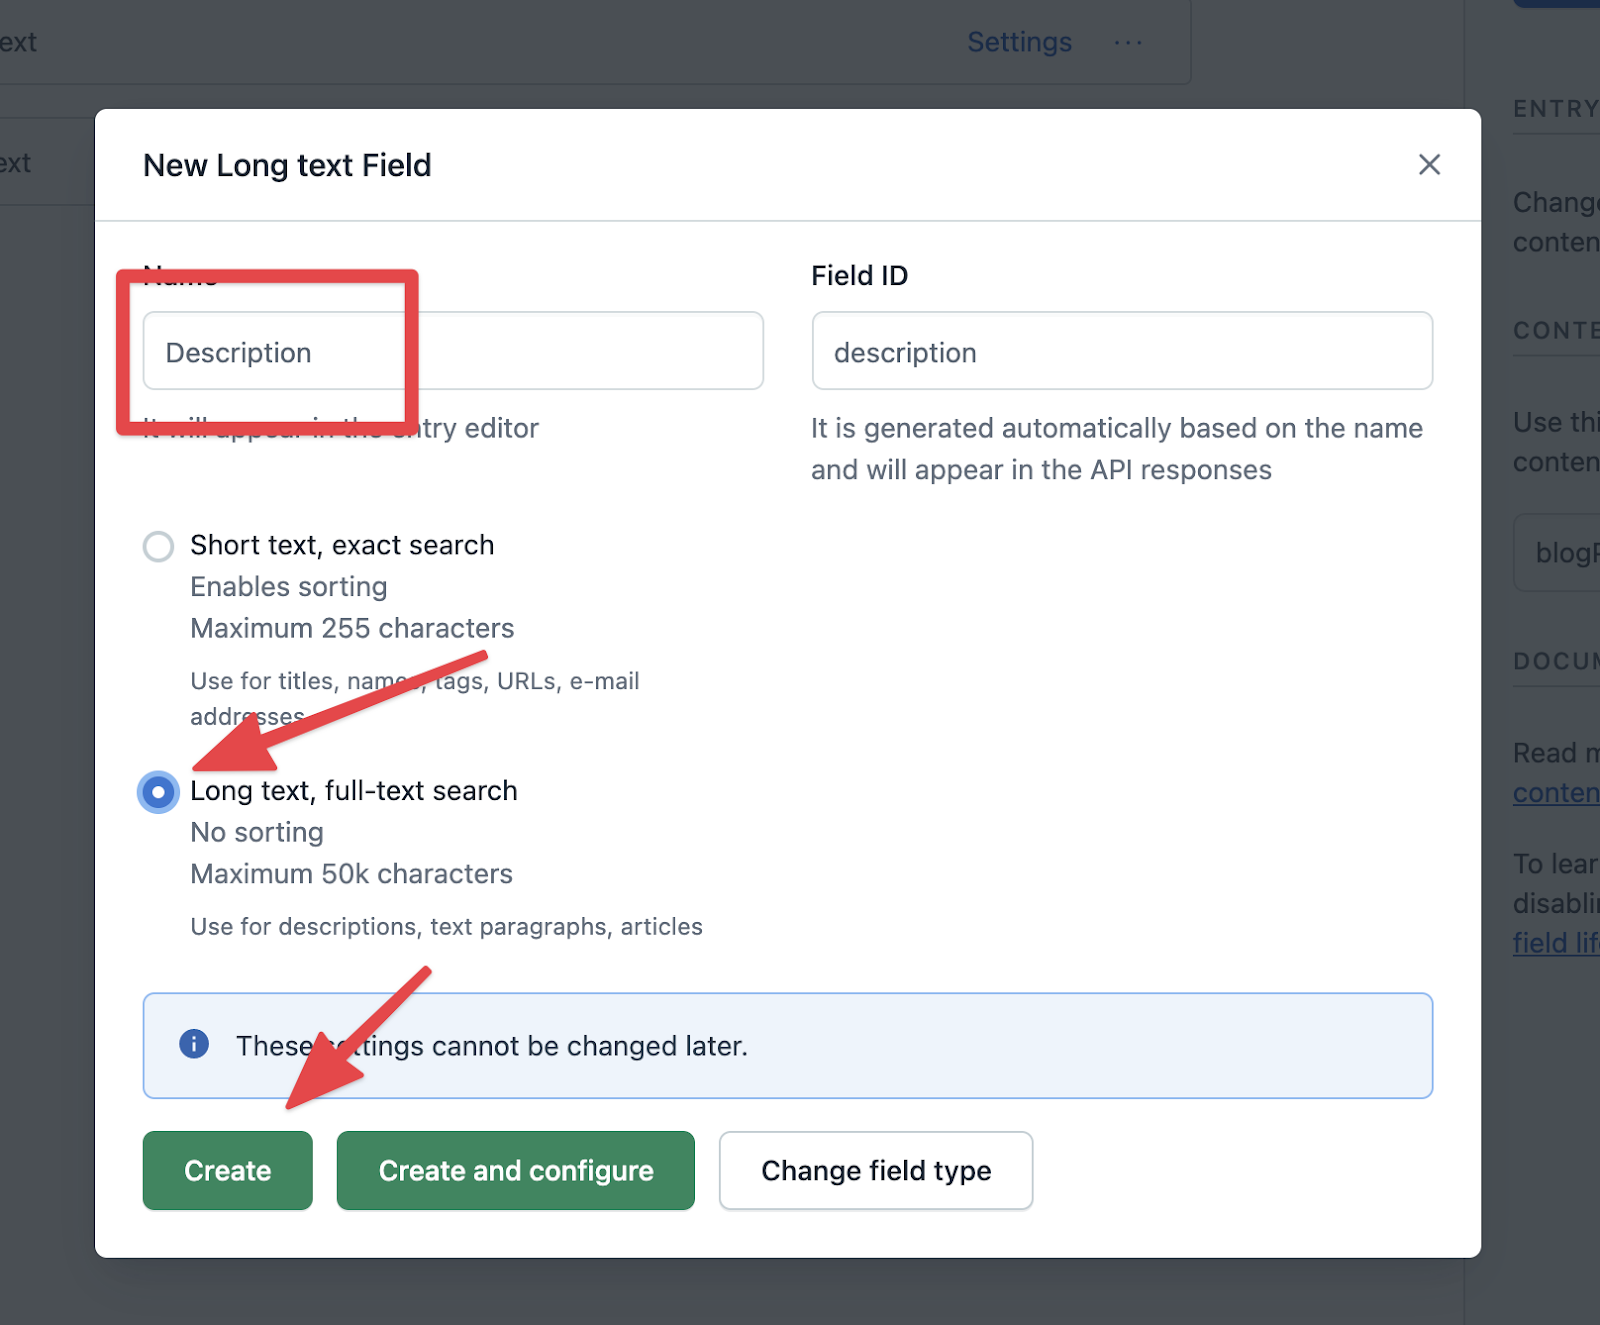
Add the Description Field:
- Click “Add field” button (same step from Title field)
- Click “Text” option (same step from Title field)
Add the Body Field:
- Click “Add field” button (same step from Title field)
- Click “Text” option (same step from Title field)
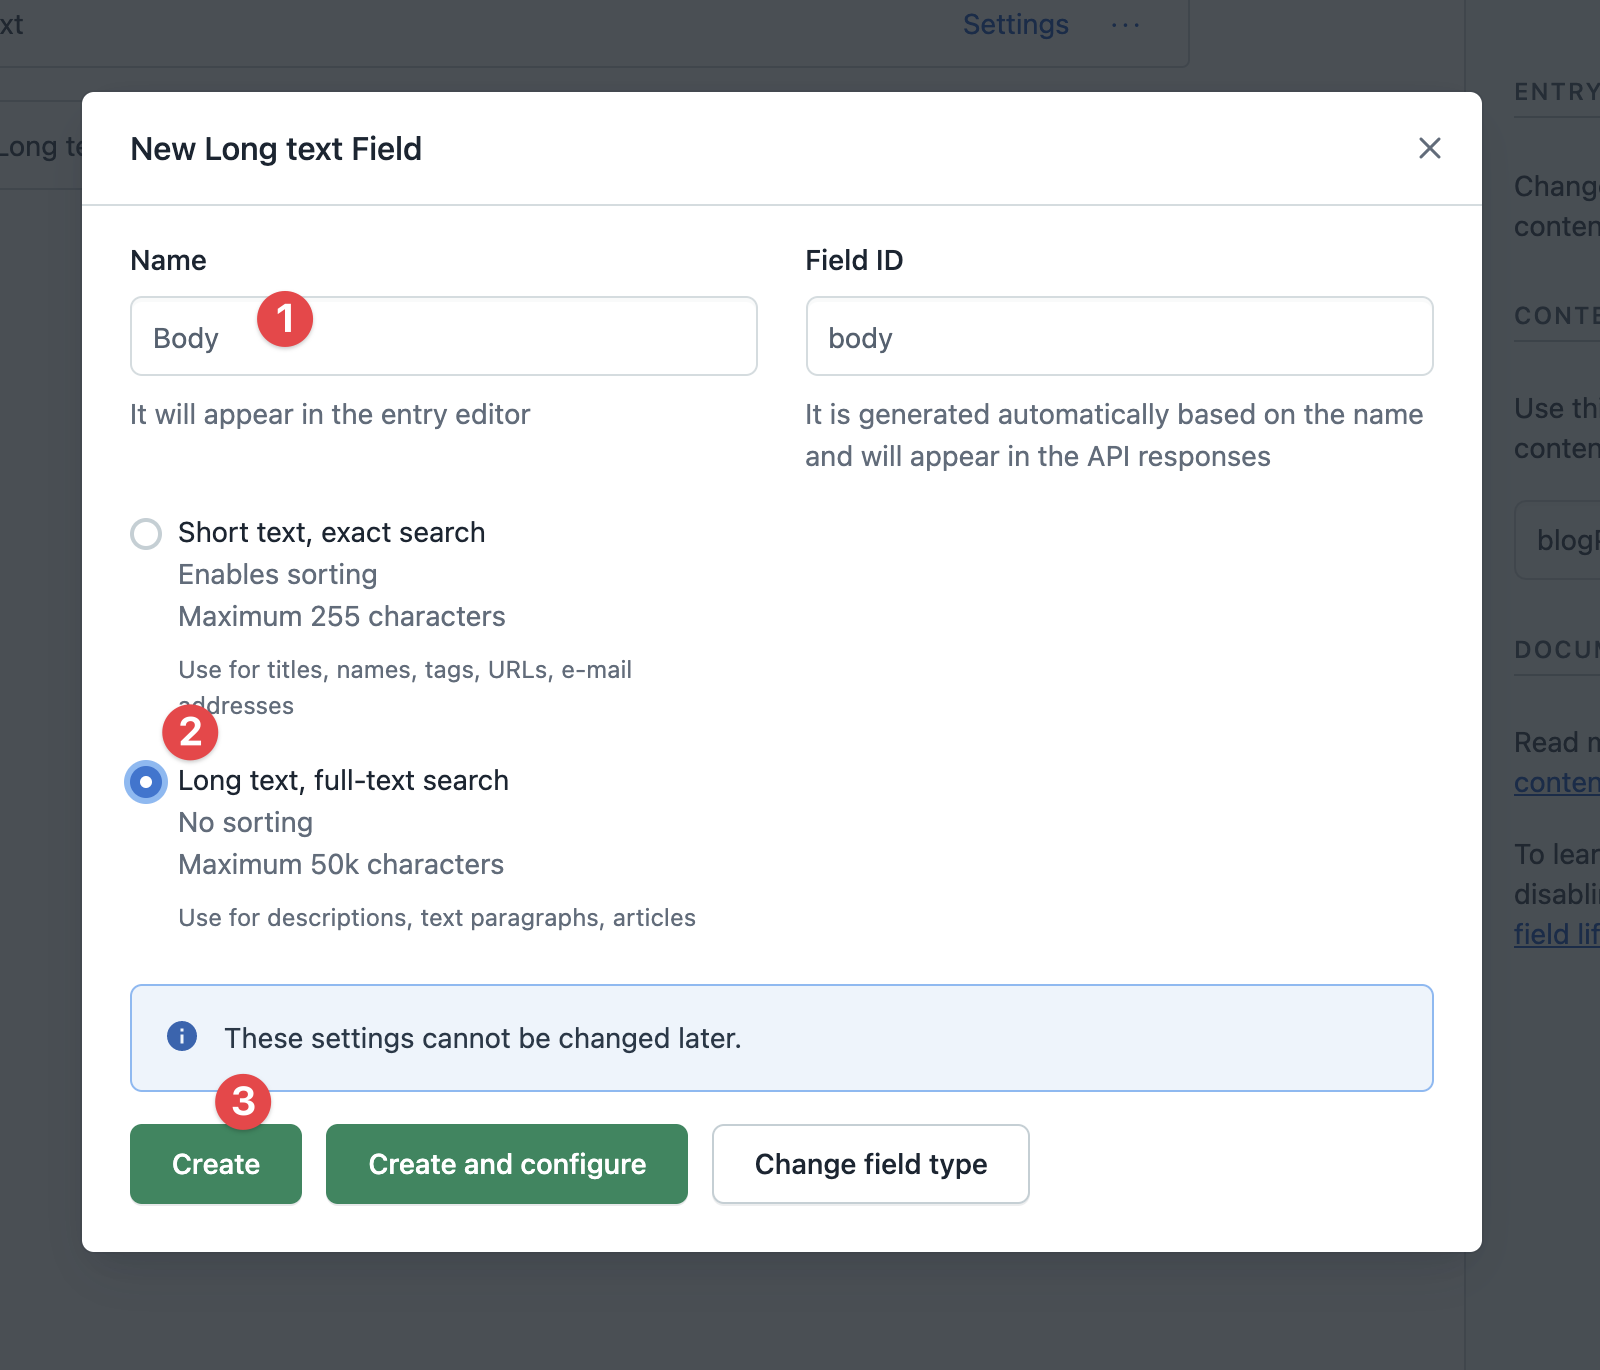
Save the content model.
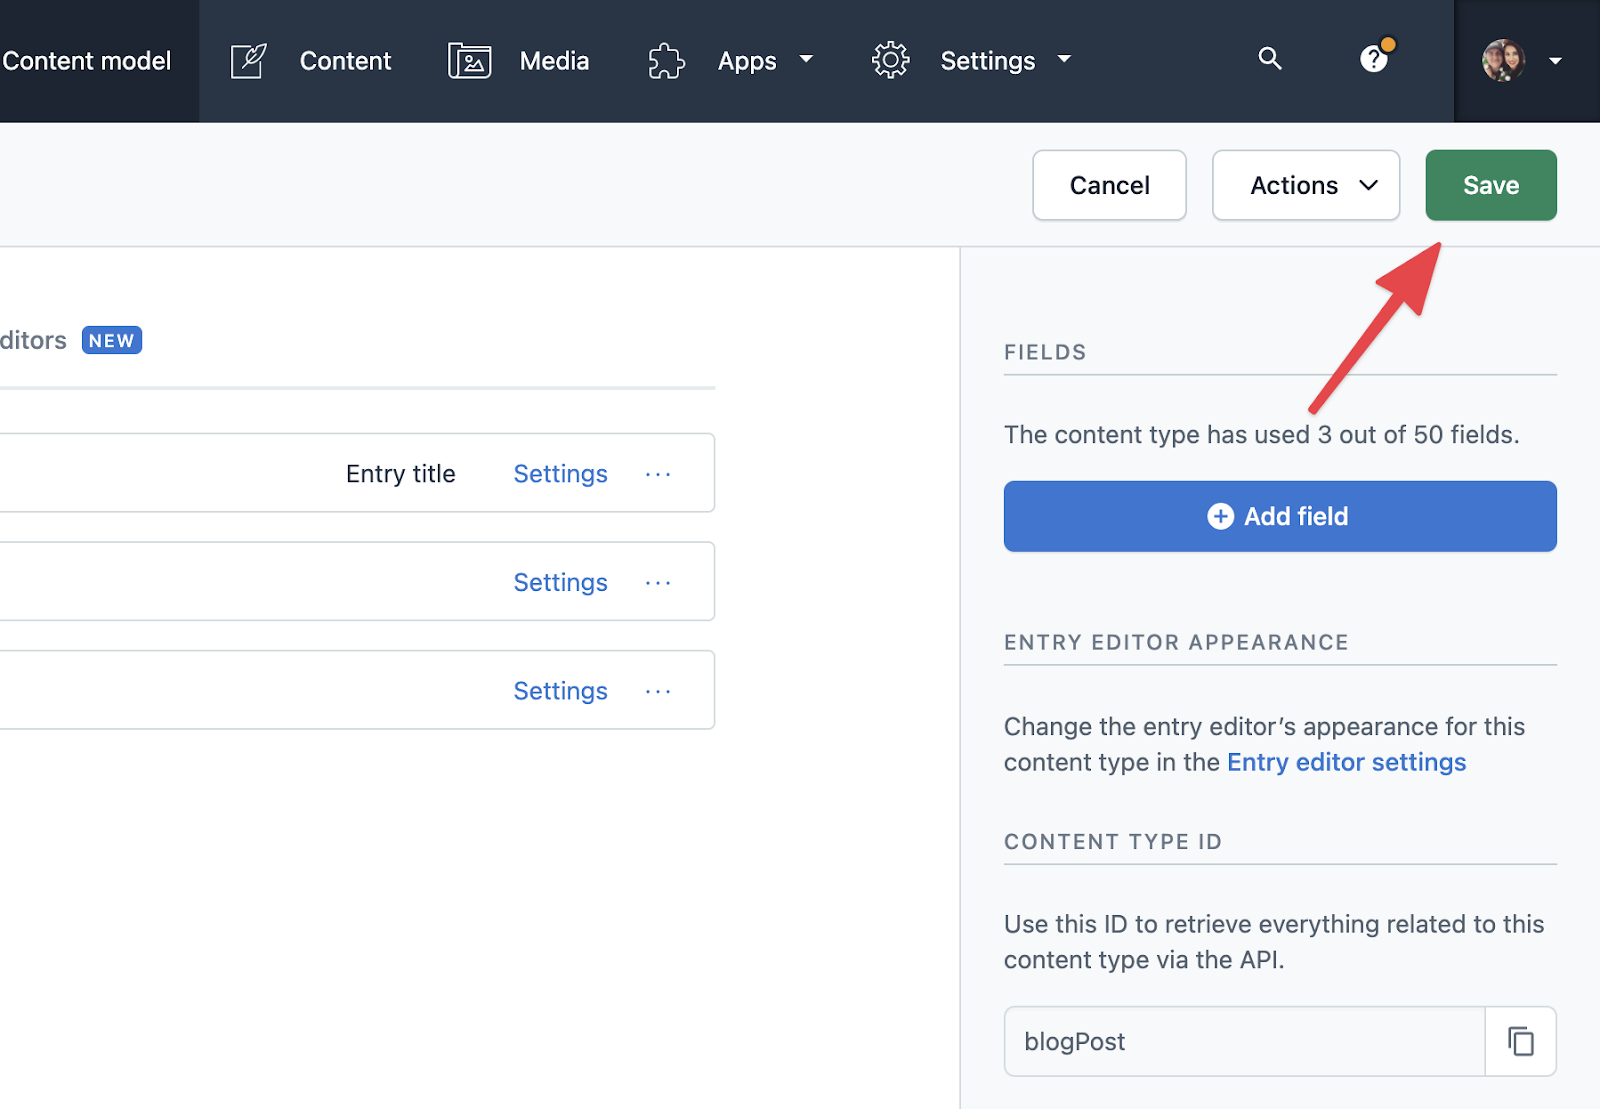
Create our first blog post
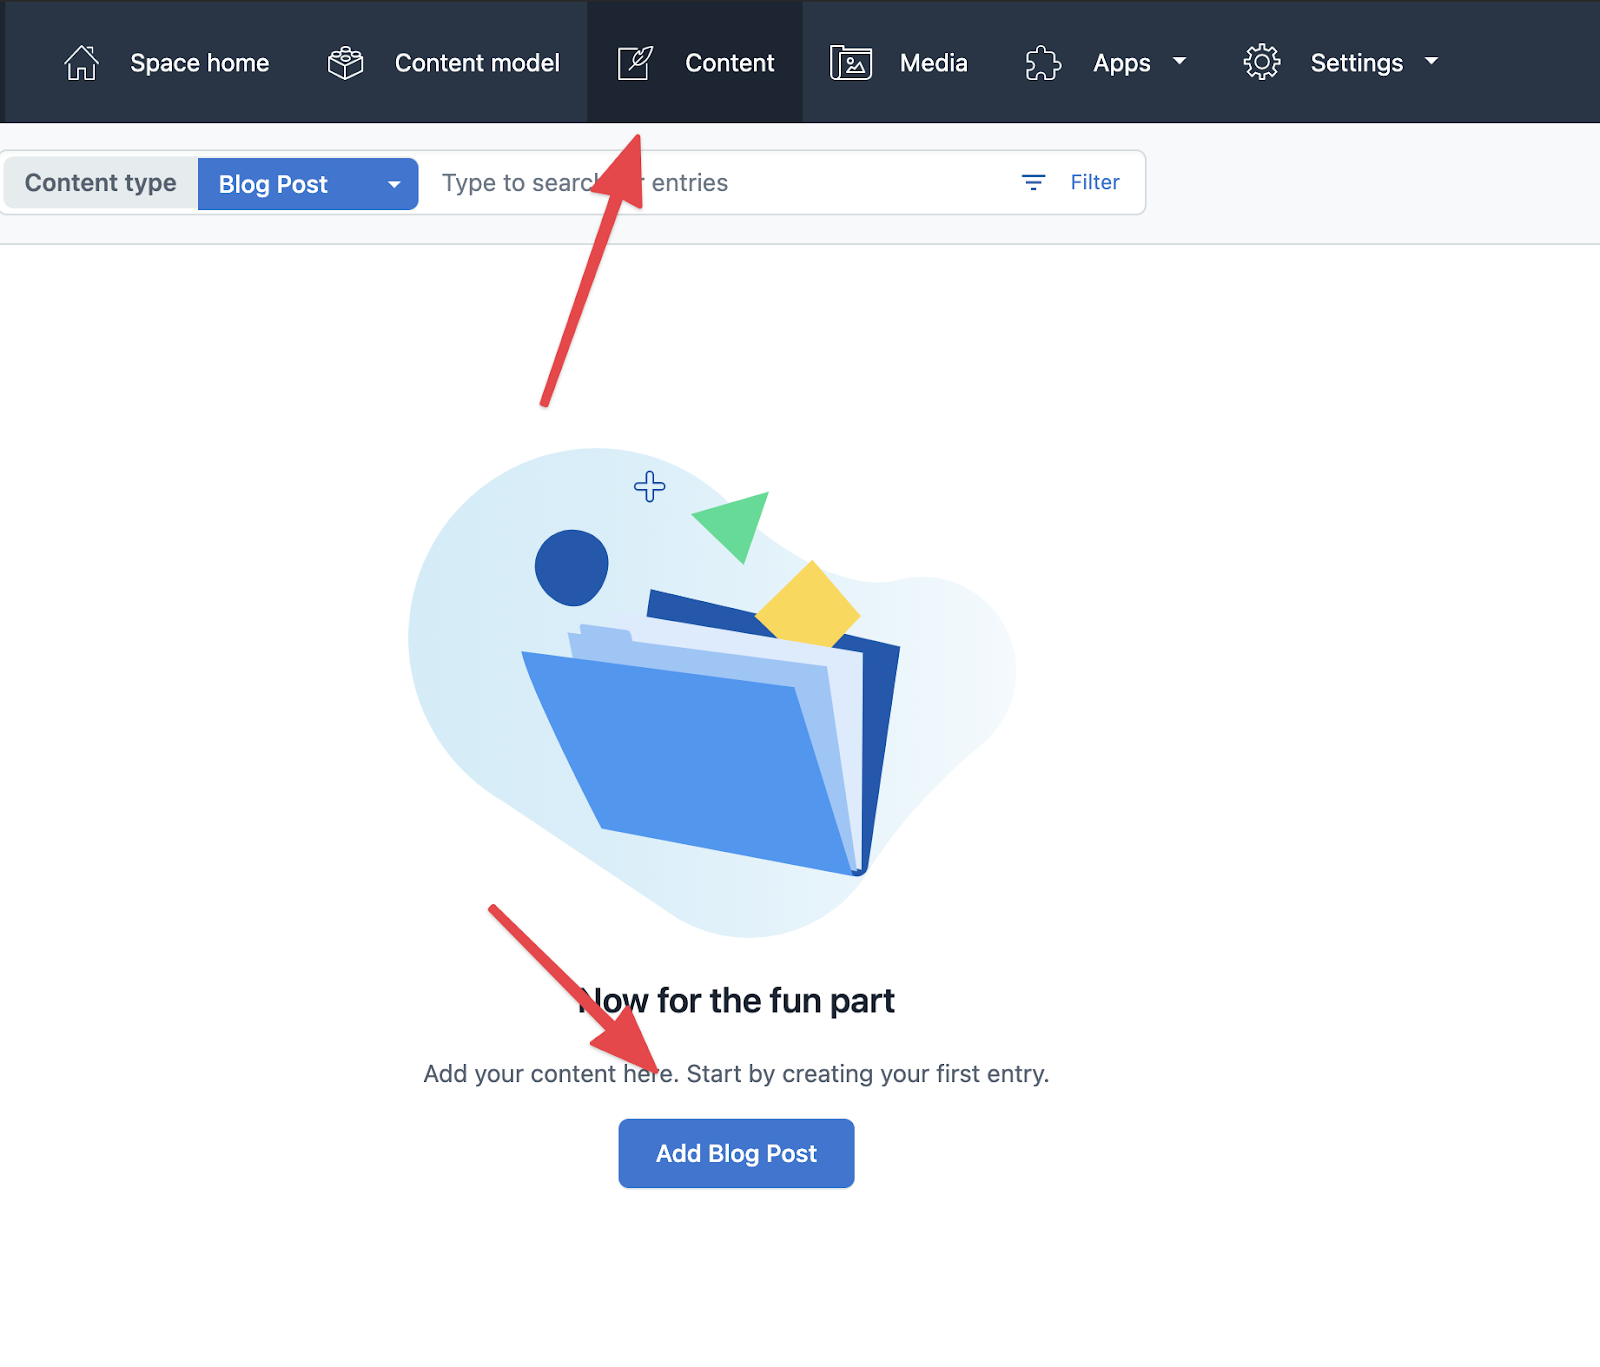
Navigate to the content page and click "Add Blog Post".
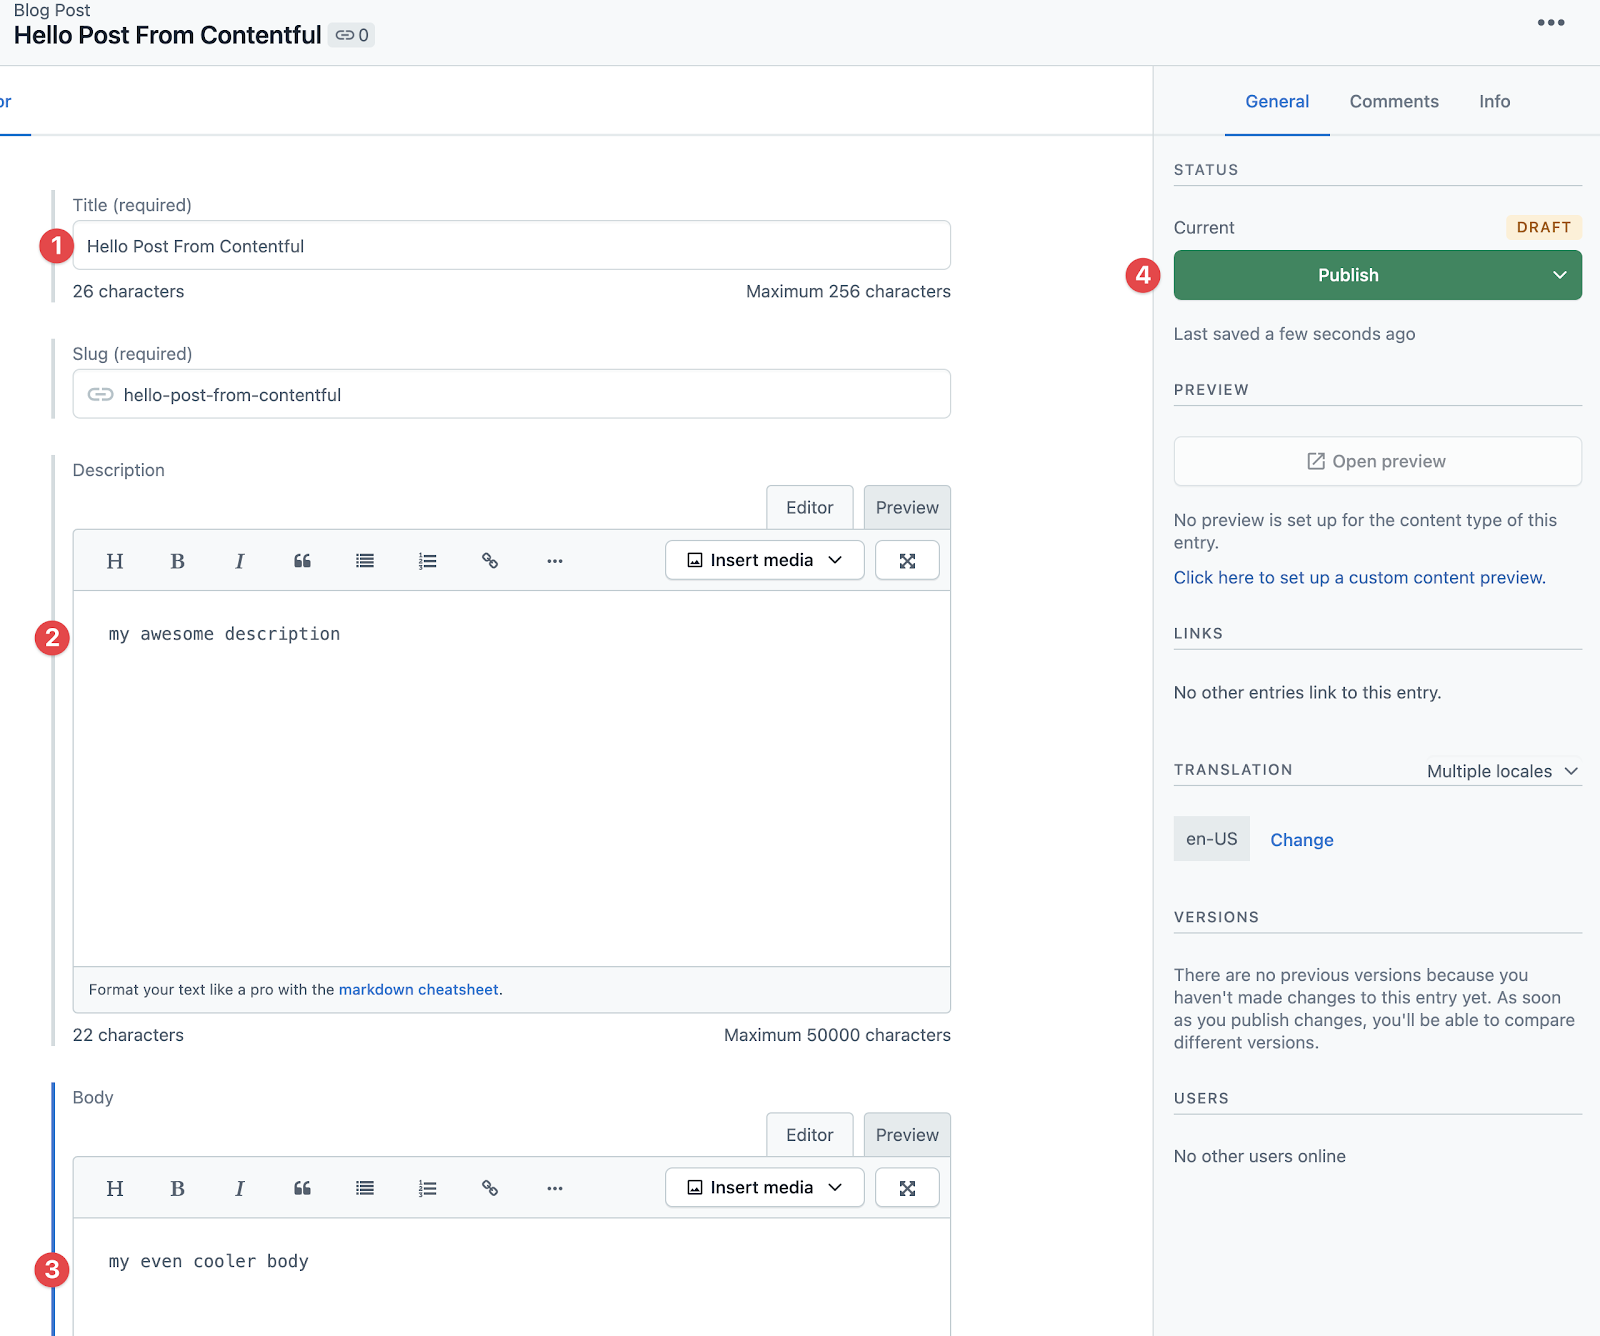
Fill out the content form.
Integrate Contentful into Gatsby
We now need to get Gatsby fetching data from Contentful. Luckily Gatsby has an official plugin to make this a breeze. I won’t give a step-by-step during this step, as I think Gatsby does a great job with their installation instructions.
Please follow this documentation to setup the gatsby-source-contentful plugin: https://www.gatsbyjs.com/plugins/gatsby-source-contentful/
Note: to find your space ID and access token go to Settings > API keys > click on “Example Key 1”. From there you should be able to copy your keys.
Modify codebase
We'll need to update these 3 files:
gatsby-node.js: used during the build process to create a page for each contentful blog postsrc/pages/index.js: to display a list of blog postssrc/template/blog-post.js: to show each individual blog post
To see all necessary changes, please review this commit: https://github.com/frankhock/hot-new-blog/commit/41084c53f522e01a023f1f4c1ecba1c5e3b919a5
Set up AWS Amplify Hosting
We’ve saved the best for last. It’s time to deploy our application.
To get started, navigate to this url: https://aws.amazon.com/amplify/hosting/
Click the “Get started for free” button.
If you’ve been following along up until this point, good job. If not, you can clone the demo repository from here: https://github.com/frankhock/hot-new-blog
When ready, click GitHub as our repo source, then click “Continue”.
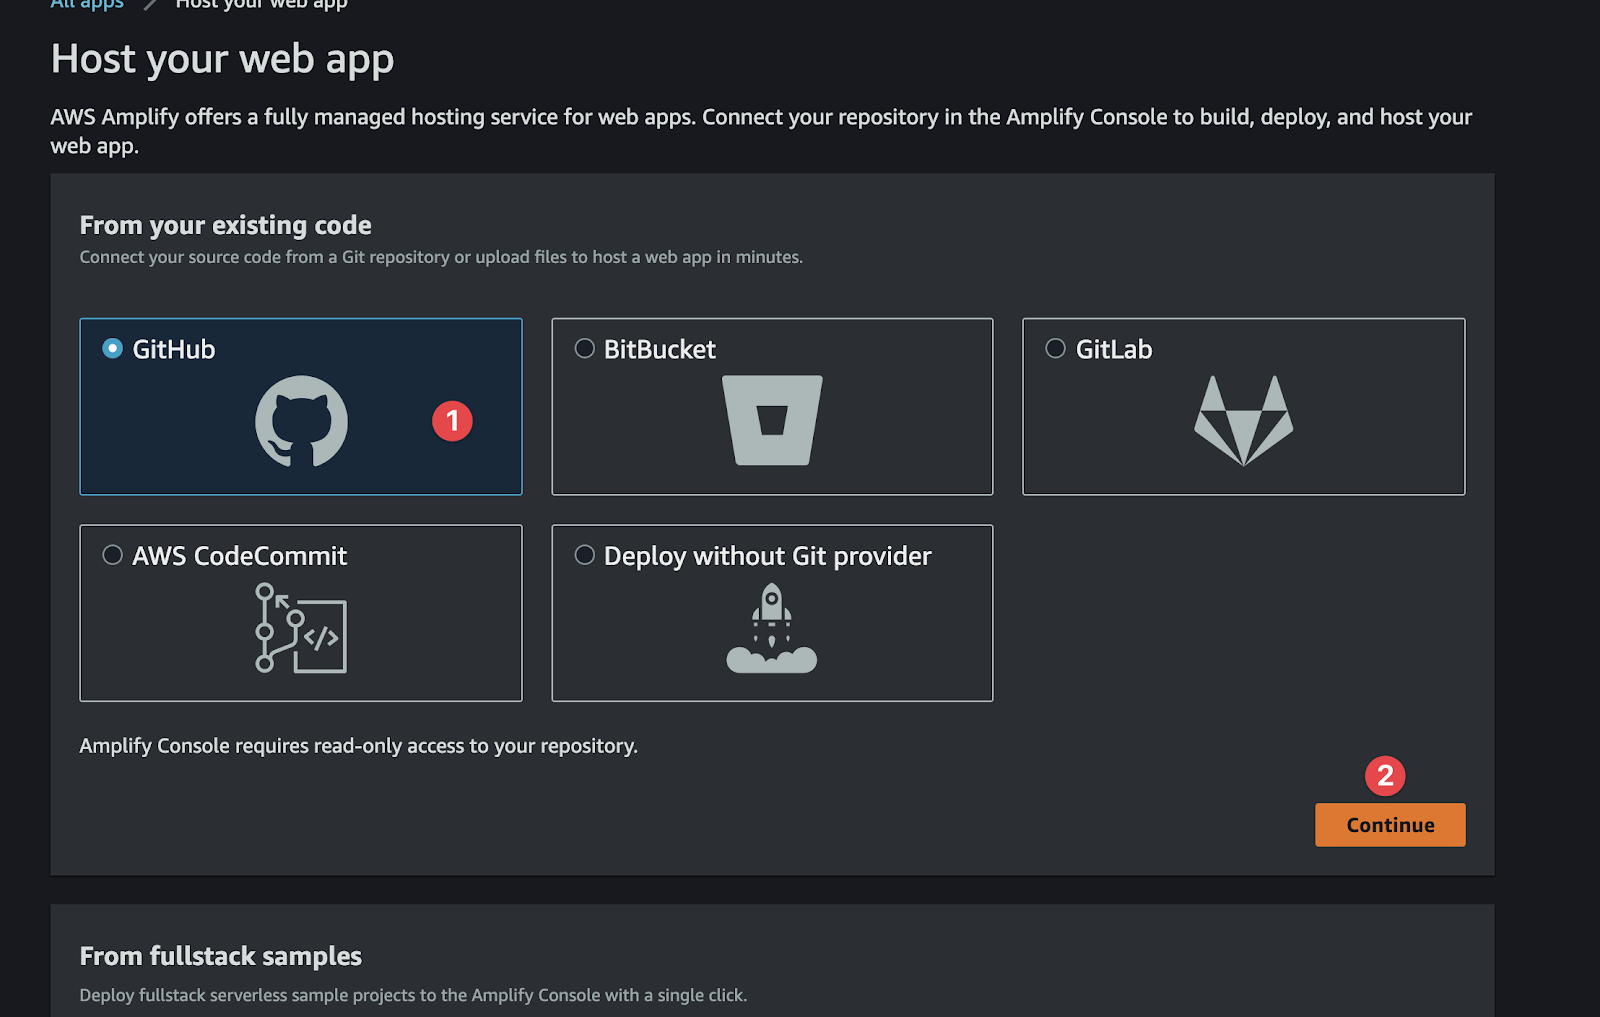
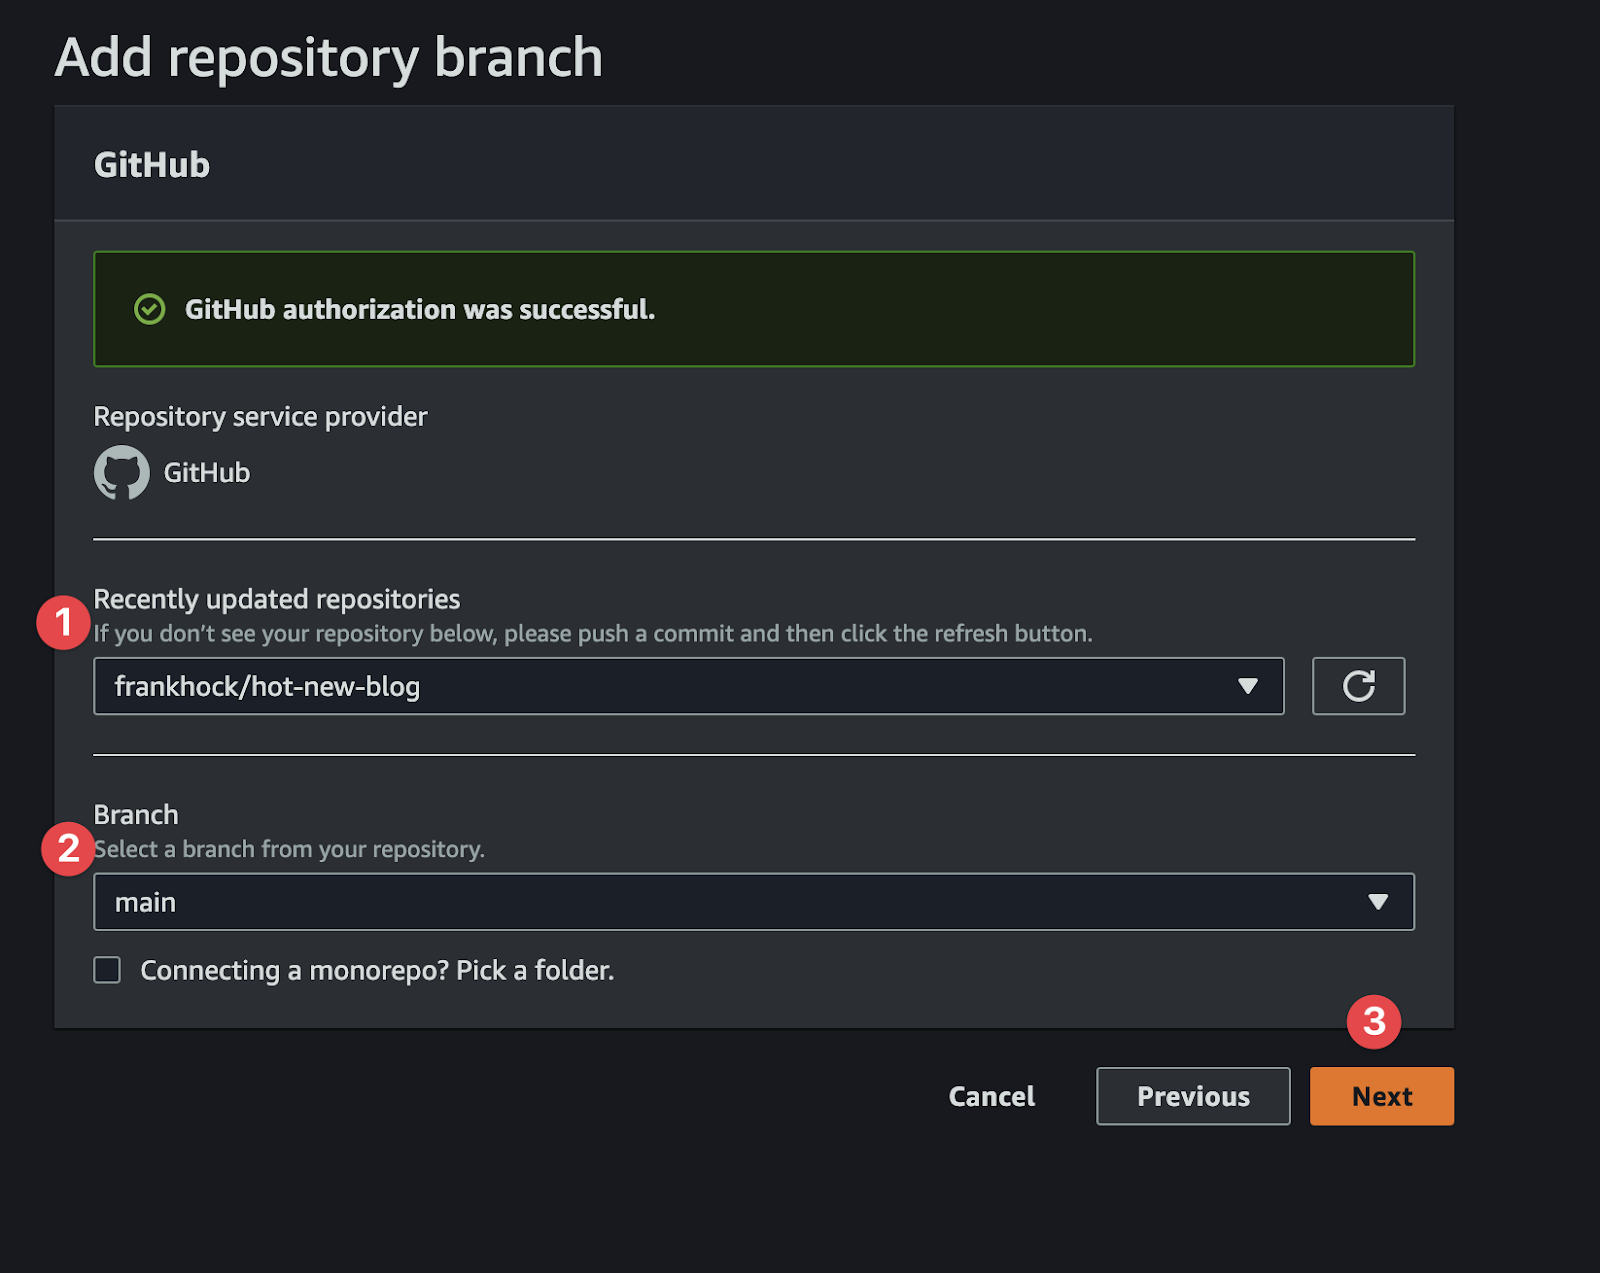
Select your repository from the select menu, then your branch, and lastly click “Next”.
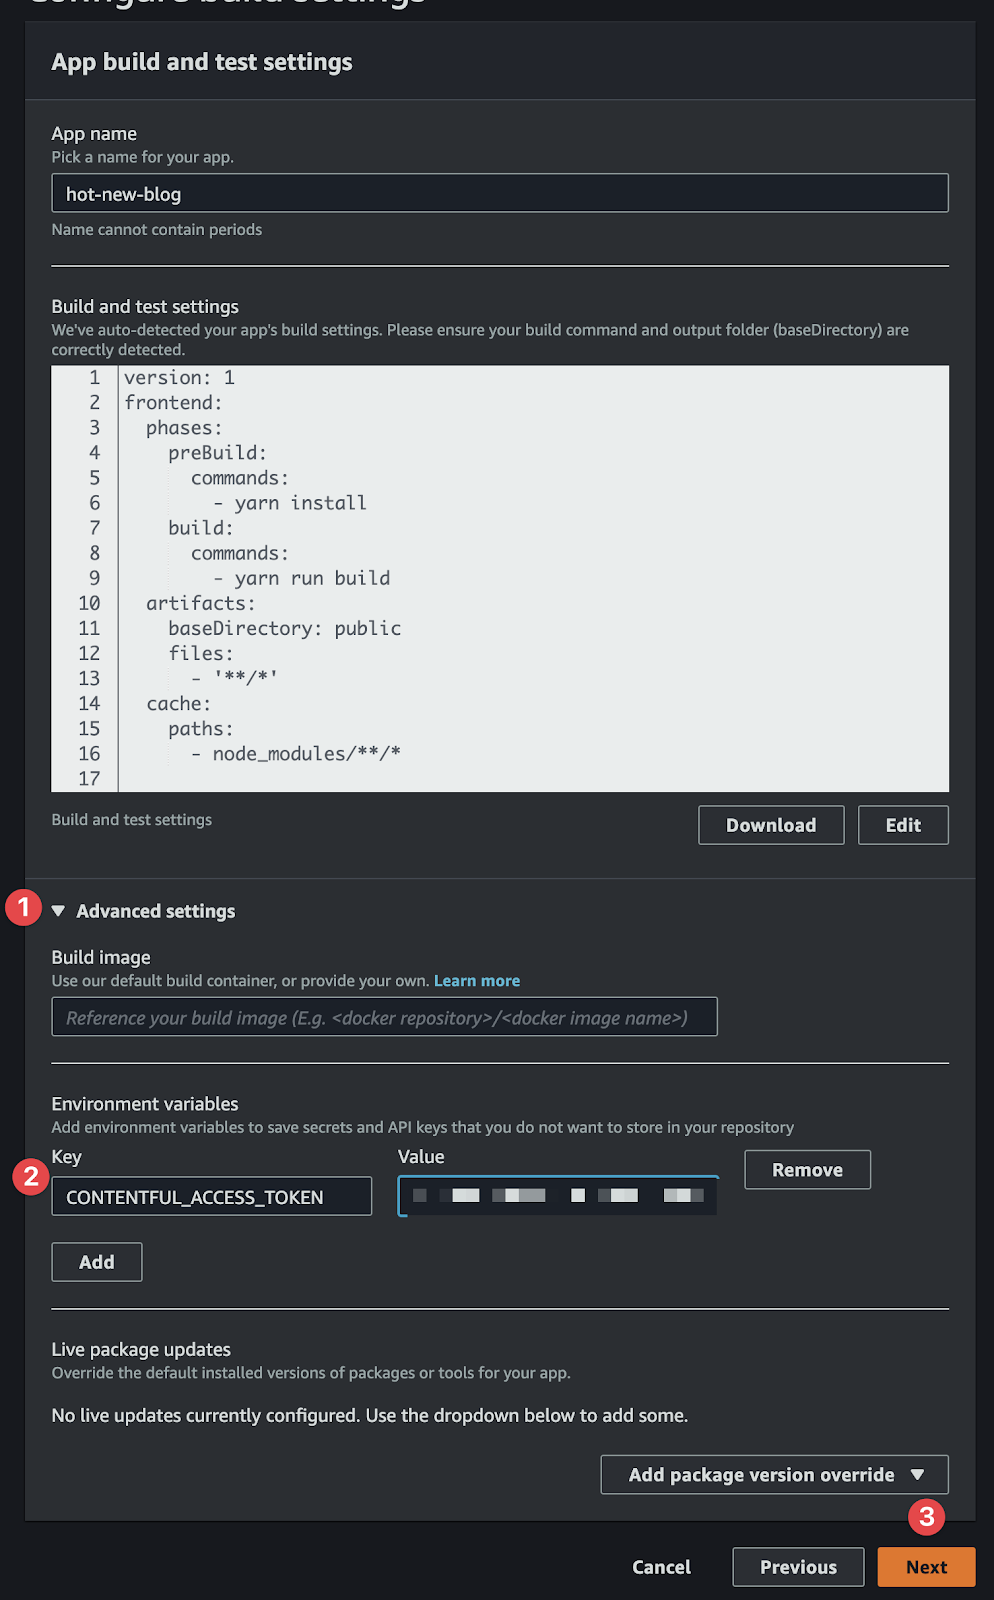
Amplify will auto-detect our Gatsby site and generate the correct settings. So nothing to do there. Click on “Advanced settings” then type in our CONTENTFUL_ACCESS_TOKEN environment variable key/value. Once finished, click “Next”.
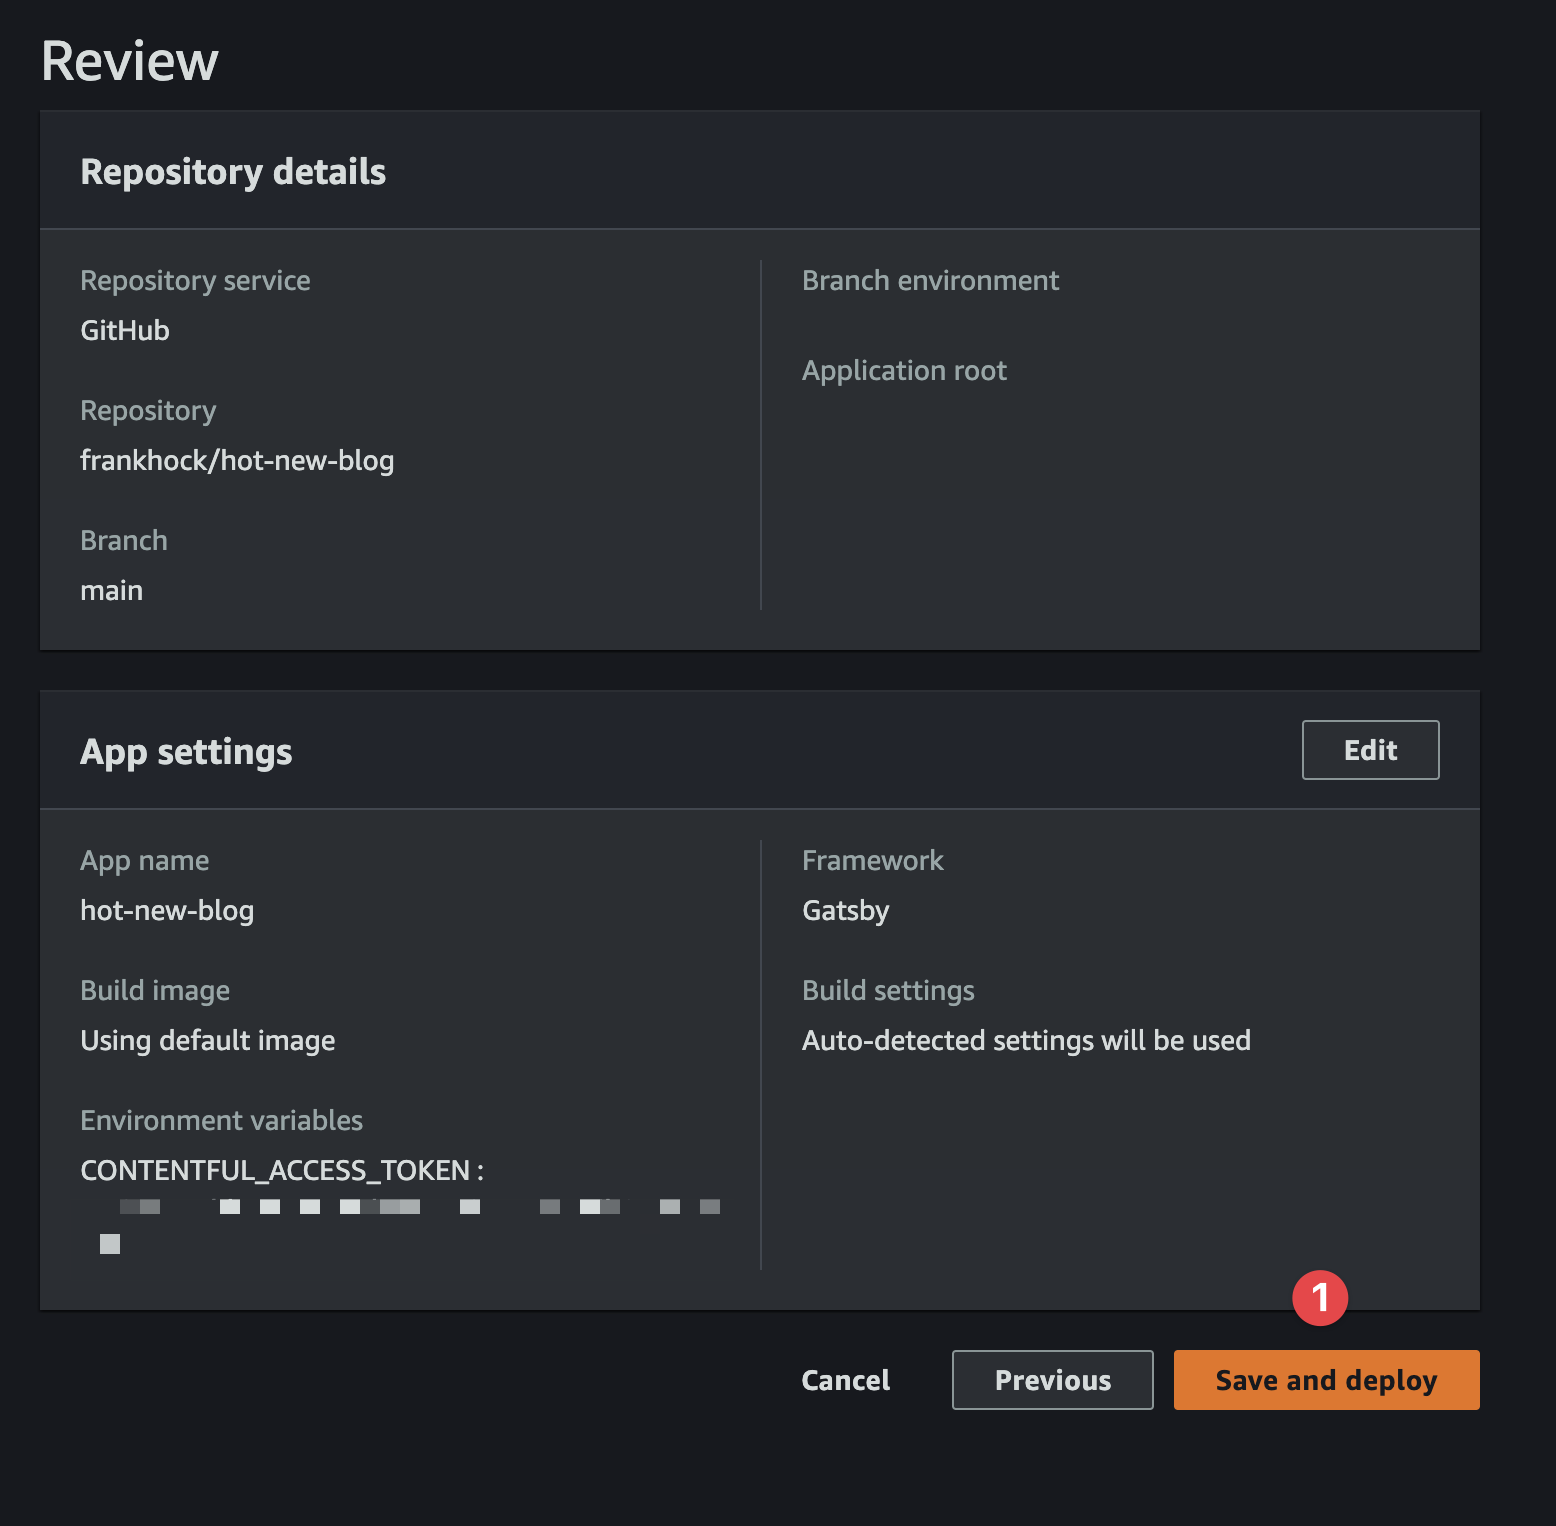
On the Review page, click “Save and deploy”.
At this point, Amplify will redirect you to your application dashboard page and you should see your application provisioning. We’re almost there.
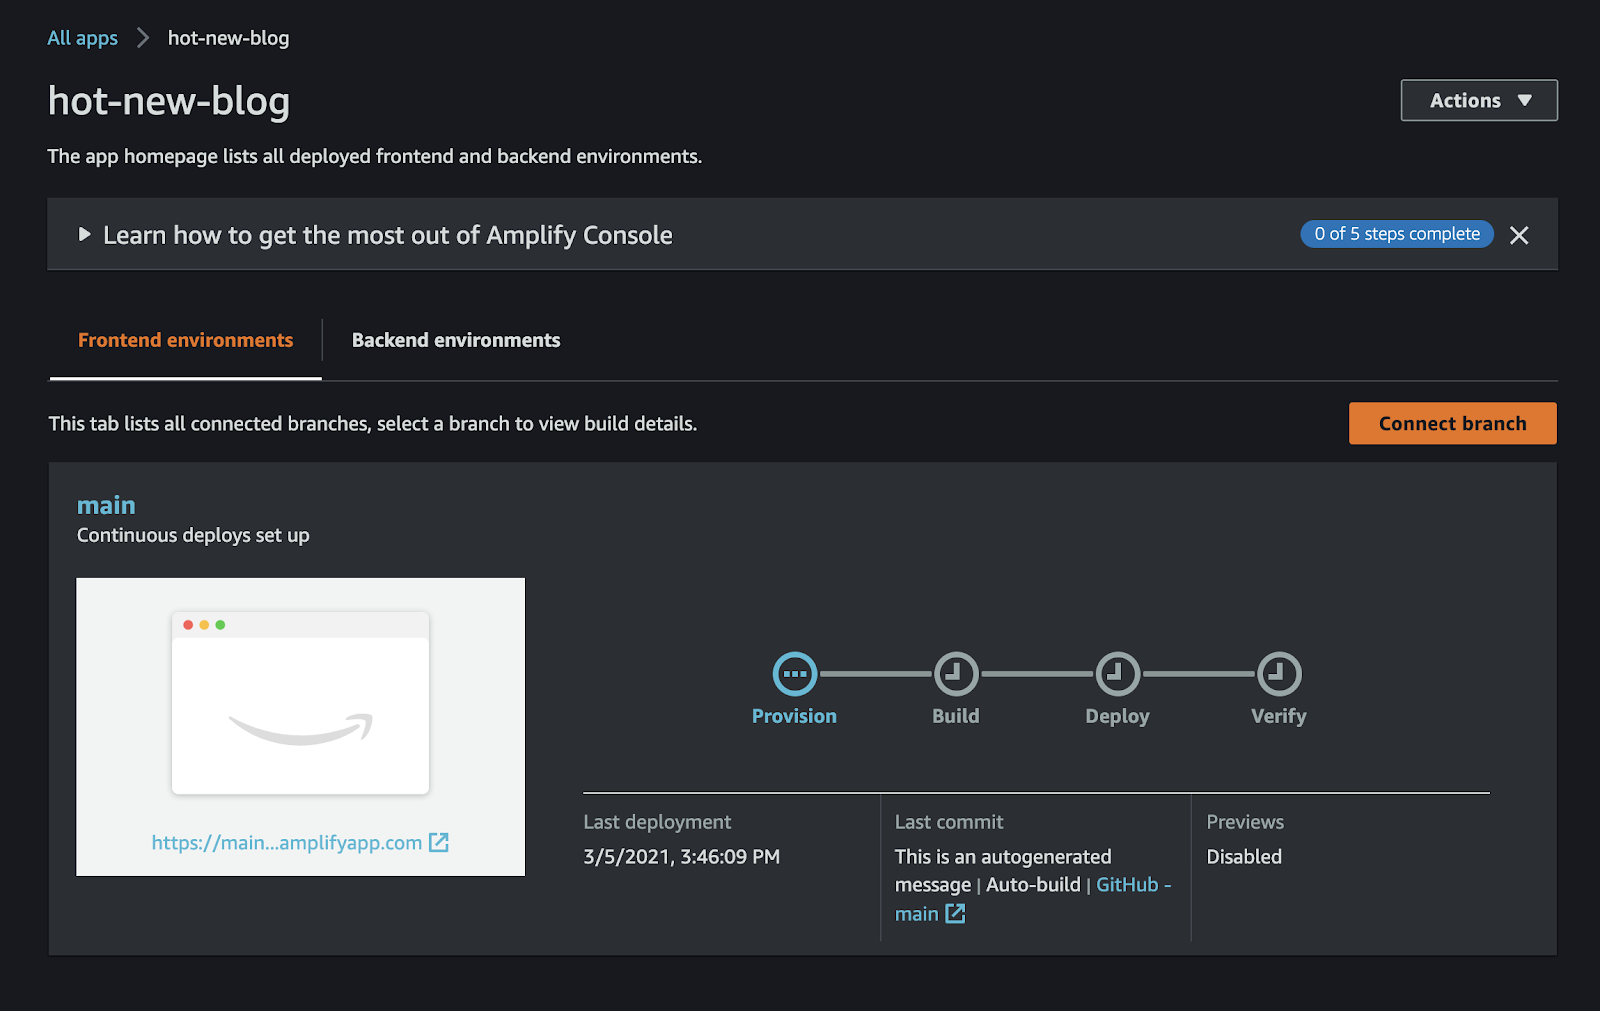
After 3-4 minutes, you should see all build steps turn green. We’re now live.
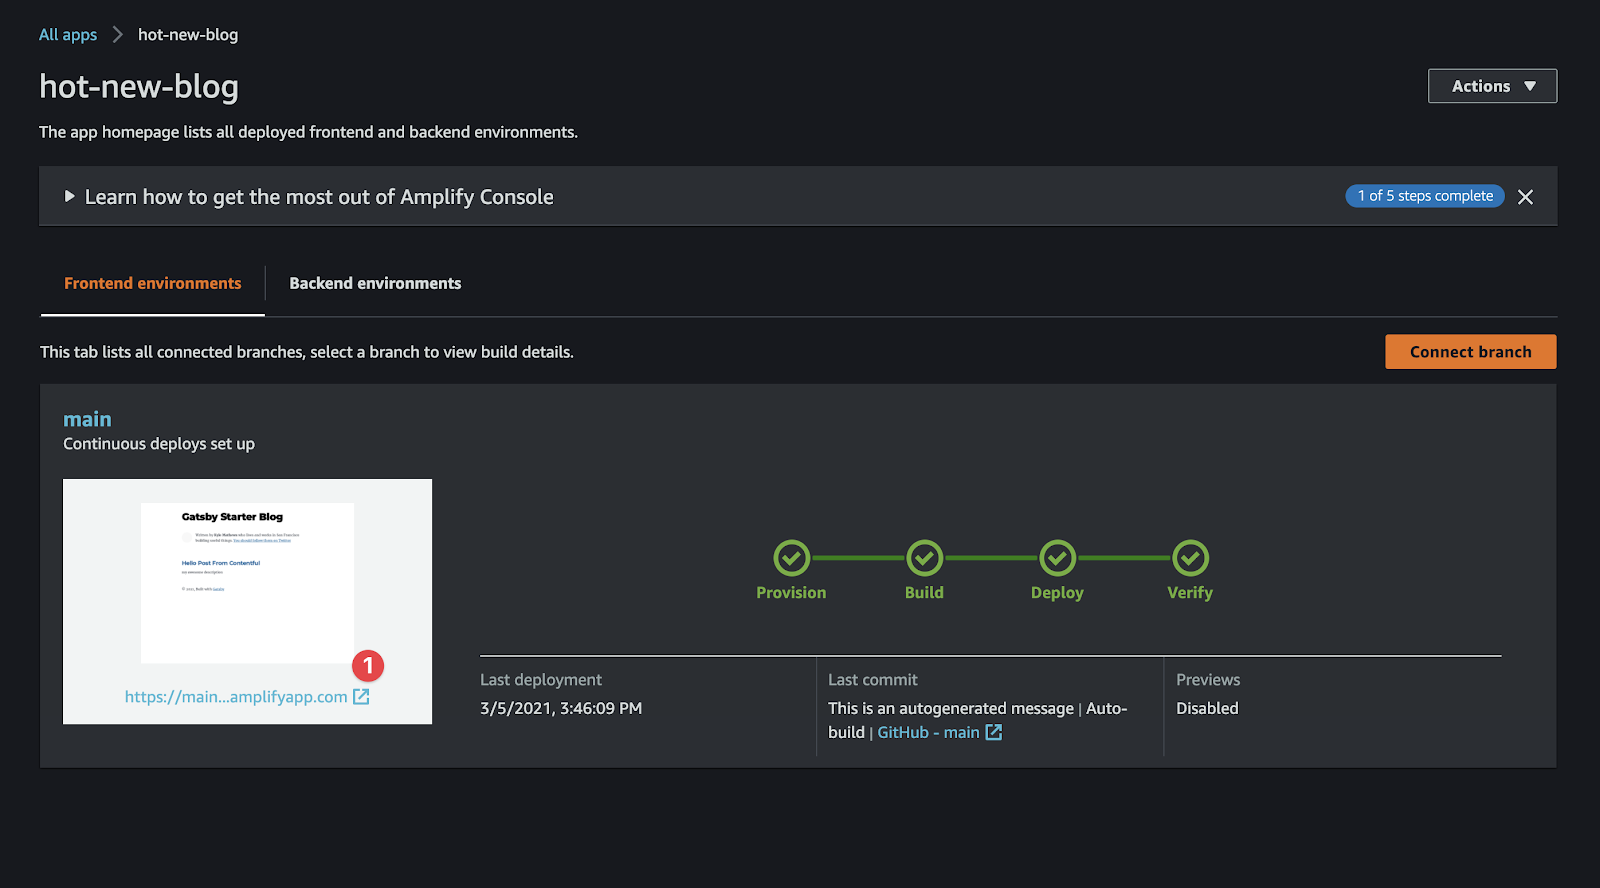
Click the link on the screenshot to view your new deployed blog. Nice job!
Wrapping Up
While I hope you learned how to get a simple blog up and running using Gatsby and AWS Amplify, I recommend learning more about benefits of the JAMstack.
Below are some great resources to check out:
- Jamstack.org (https://jamstack.org/)
- Jamstack Book (https://www.netlify.com/oreilly-jamstack/)